crwdns2933423:0crwdne2933423:0

Electronics Skills Kit 101

crwdns2936315:0crwdne2936315:0
crwdns2936321:0crwdne2936321:0
crwdns2931653:018crwdne2931653:0
Electronics Skills Kit 101: crwdns2935265:00crwdnd2935265:01crwdnd2935265:03crwdne2935265:0 Electronics Skills Kit 101: crwdns2935265:00crwdnd2935265:02crwdnd2935265:03crwdne2935265:0 Electronics Skills Kit 101: crwdns2935265:00crwdnd2935265:03crwdnd2935265:03crwdne2935265:0
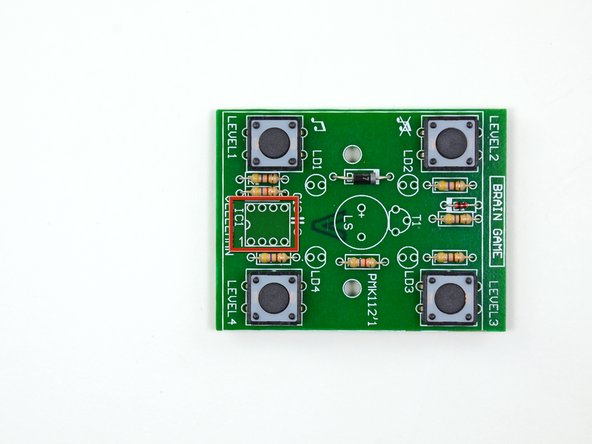
  • Next you will install the IC socket, also known as a CPU socket. IC sockets use a mechanical connection to connect a processor to a printed circuit board. These sockets allows the processor to be easily replaced without the risk of damage associated with soldering processors directly to a circuit board.

  • Stick the eight leads of the IC socket through the holes in the rectangle marked IC1. Make sure that the semi-circle on the top of the socket lines up with the semi-circle printed on the edge of the rectangle on the circuit board.

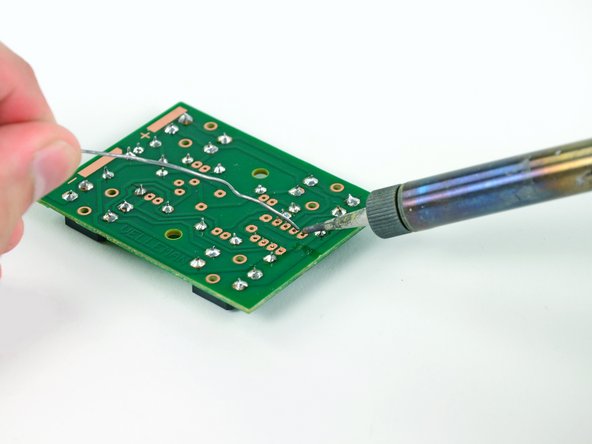
  • Turn the board over and solder the eight leads of the IC socket to the board. Similar to soldering the buttons, there is no need to trim any excess off the leads.

Ora dovrai installare la presa IC, anche conosciuta come presa della CPU. Le prese IC usano una connessione meccanica per collegare un processore su una scheda stampata. Queste prese permettono al processore di essere sostituito facilmente senza il rischio di danneggiare il processore saldandolo direttamente alla scheda logica.

Infila le otto gambe della presa IC nei fori del rettangolo chiamato IC1. Assicurati che il semicerchio sopra la presa sia allineato con quello stampato sul bordo del rettangolo sulla scheda logica.

Gira la scheda a faccia in giù e salda le otto gambe della presa IC alla scheda. Come per i tasti, non c'è bisogno di tagliare le gambe di lunghezza eccessiva.

crwdns2944171:0crwdnd2944171:0crwdnd2944171:0crwdnd2944171:0crwdne2944171:0