crwdns2933423:0crwdne2933423:0

Kit d'introduction à l'électronique

crwdns2936315:0crwdne2936315:0
crwdns2936317:0crwdne2936317:0
crwdns2931653:018crwdne2931653:0
Electronics Skills Kit 101: crwdns2935265:00crwdnd2935265:01crwdnd2935265:03crwdne2935265:0 Electronics Skills Kit 101: crwdns2935265:00crwdnd2935265:02crwdnd2935265:03crwdne2935265:0 Electronics Skills Kit 101: crwdns2935265:00crwdnd2935265:03crwdnd2935265:03crwdne2935265:0
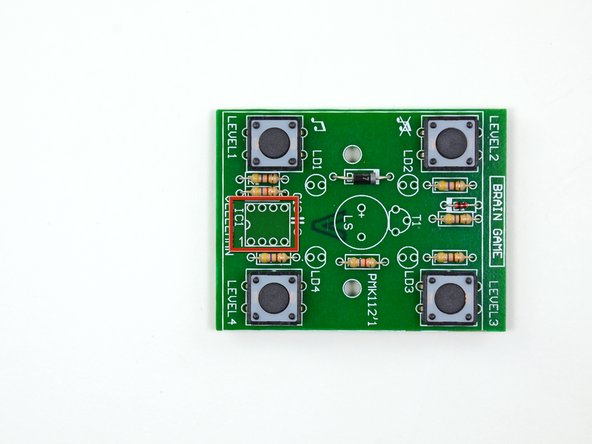
  • Next you will install the IC socket, also known as a CPU socket. IC sockets use a mechanical connection to connect a processor to a printed circuit board. These sockets allows the processor to be easily replaced without the risk of damage associated with soldering processors directly to a circuit board.

  • Stick the eight leads of the IC socket through the holes in the rectangle marked IC1. Make sure that the semi-circle on the top of the socket lines up with the semi-circle printed on the edge of the rectangle on the circuit board.

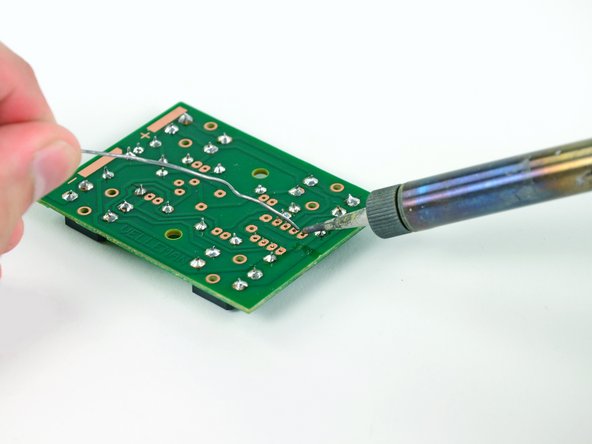
  • Turn the board over and solder the eight leads of the IC socket to the board. Similar to soldering the buttons, there is no need to trim any excess off the leads.

La prochaine étape est d'installer le socket (ou "support du processeur" ou "réceptacle de processeur"). Un socket permet la connexion mécanique entre un processeur et une carte mère. Il permet de remplacer facilement le processeur sans risquer de l'endommager en faisant de la soudure.

Enfoncez les huit pattes du socket dans les trous du rectangle noté IC1. Faites bien correspondre le demi-cercle en haut du socket avec le demi-cercle imprimé sur le bord du rectangle sur la carte mère.

Retournez la carte et soudez les huit pattes du socket à la carte. Comme pour les boutons, pas besoin de tailler les pattes à la bonne longueur.

crwdns2944171:0crwdnd2944171:0crwdnd2944171:0crwdnd2944171:0crwdne2944171:0