crwdns2933423:0crwdne2933423:0

Elektronica-vaardigheden 101

crwdns2936315:0crwdne2936315:0
crwdns2936313:0crwdne2936313:0
crwdns2931653:06crwdne2931653:0
Electronics Skills Kit 101: crwdns2935265:00crwdnd2935265:01crwdnd2935265:03crwdne2935265:0 Electronics Skills Kit 101: crwdns2935265:00crwdnd2935265:02crwdnd2935265:03crwdne2935265:0 Electronics Skills Kit 101: crwdns2935265:00crwdnd2935265:03crwdnd2935265:03crwdne2935265:0
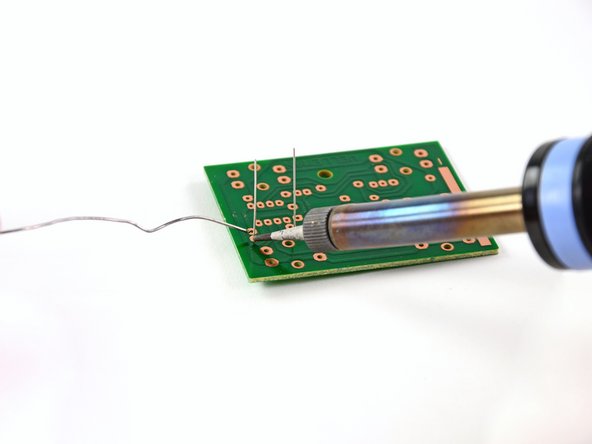
  • Here we are: the moment of truth. It's time to get that solder flowing.

  • Set the tip of the soldering iron on the two parts to be connected. In this case, that's the resistor lead and the copper trace on the circuit board.

  • Touch your solder to the tip of your soldering iron to melt it onto the joint. Don't hold it there for more than a second or two.

  • Quickly, but not frantically, pull both the soldering iron and the solder away from the joint.

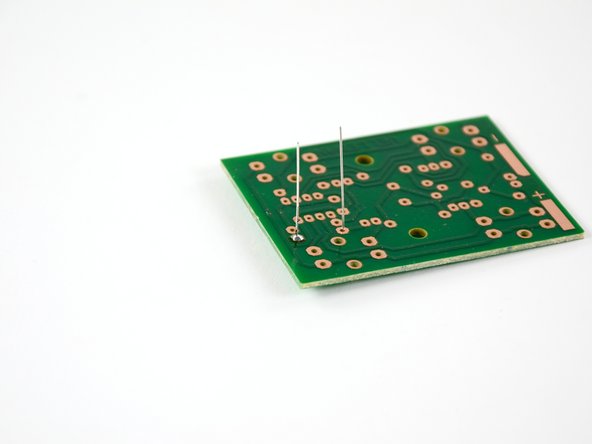
  • Your solder joint should be shiny and conical, and not expand beyond the copper trace.

Hier zijn we dan: het moment van de waarheid! Het is tijd om dat soldeertin te laten smelten.

Plaats de punt van de soldeerbout op de twee te verbinden delen. In dit geval zijn dat de weerstandsdraad en het koperen spoor op de printplaat.

Plaats het soldeertin op de punt van je soldeerbout om het op de verbinding te laten smelten. Houd het daar niet langer dan een seconde of twee vast.

Haal nu snel zowel de soldeerbout als het soldeertin snel maar gecontroleerd weg van de verbinding. Doe dit zonder de verbinding te bewegen.

Je soldeerverbinding zou glanzend en enigszins kegelvorming moeten zijn en niet verder moeten lopen dan het koperspoor.

crwdns2944171:0crwdnd2944171:0crwdnd2944171:0crwdnd2944171:0crwdne2944171:0