crwdns2935425:06crwdne2935425:0
crwdns2931653:06crwdne2931653:0


-
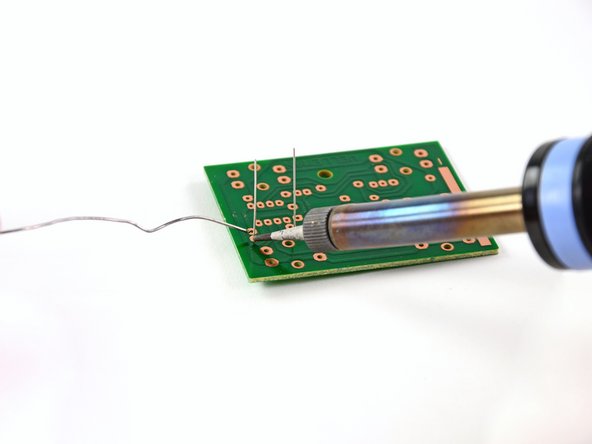
Here we are: the moment of truth. It's time to get that solder flowing.
-
Set the tip of the soldering iron on the two parts to be connected. In this case, that's the resistor lead and the copper trace on the circuit board.
-
Touch your solder to the tip of your soldering iron to melt it onto the joint. Don't hold it there for more than a second or two.
-
Quickly, but not frantically, pull both the soldering iron and the solder away from the joint.
-
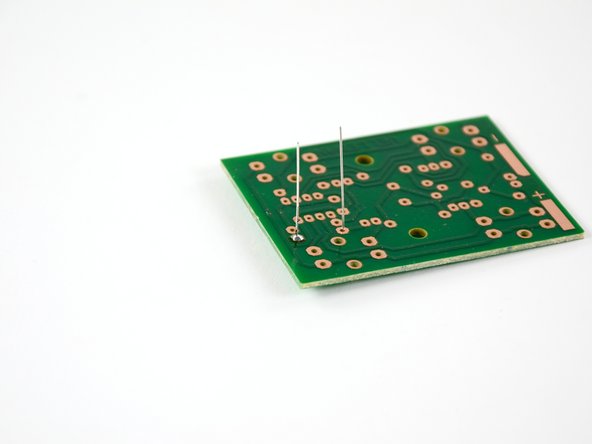
Your solder joint should be shiny and conical, and not expand beyond the copper trace.
crwdns2944171:0crwdnd2944171:0crwdnd2944171:0crwdnd2944171:0crwdne2944171:0