crwdns2933423:0crwdne2933423:0

Kit d'introduction à l'électronique

crwdns2936315:0crwdne2936315:0
crwdns2936317:0crwdne2936317:0
crwdns2931653:06crwdne2931653:0
Electronics Skills Kit 101: crwdns2935265:00crwdnd2935265:01crwdnd2935265:03crwdne2935265:0 Electronics Skills Kit 101: crwdns2935265:00crwdnd2935265:02crwdnd2935265:03crwdne2935265:0 Electronics Skills Kit 101: crwdns2935265:00crwdnd2935265:03crwdnd2935265:03crwdne2935265:0
  • Here we are: the moment of truth. It's time to get that solder flowing.

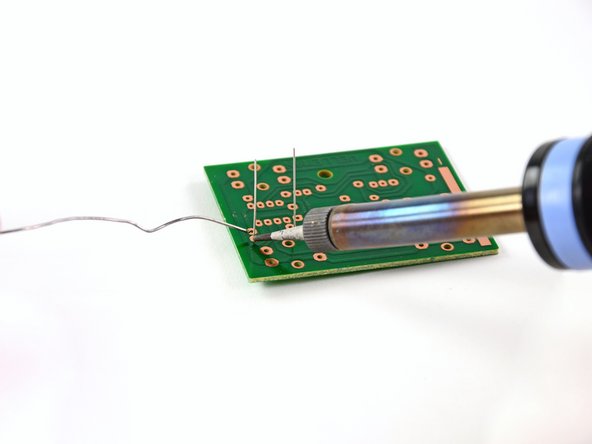
  • Set the tip of the soldering iron on the two parts to be connected. In this case, that's the resistor lead and the copper trace on the circuit board.

  • Touch your solder to the tip of your soldering iron to melt it onto the joint. Don't hold it there for more than a second or two.

  • Quickly, but not frantically, pull both the soldering iron and the solder away from the joint.

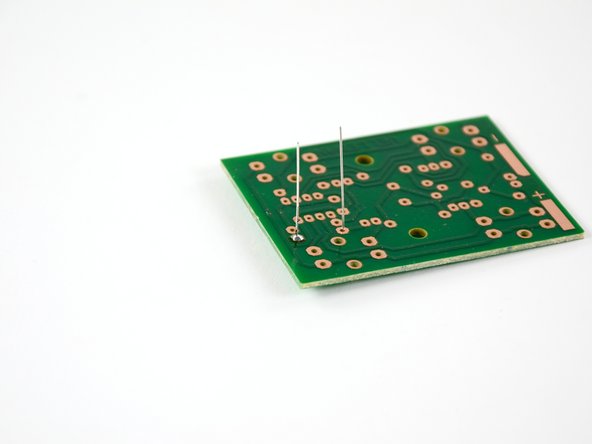
  • Your solder joint should be shiny and conical, and not expand beyond the copper trace.

Nous y voilà : le moment de vérité. Il est temps de se mettre à souder.

Positionnez la panne de votre fer à souder sur les deux composants à connecter. Dans ce cas, ce sont la patte de la résistance et la piste en cuivre sur le circuit imprimé.

Mettez votre soudure en contact avec votre fer pour la faire fondre sur la jonction. Ne l'y laissez pas pour plus d'une ou deux secondes.

Rapidement, mais pas frénétiquement, retirez à la fois le fer et la soudure du brasage.

La soudure doit être brillante et conique, et ne pas s'étaler au-delà de la piste en cuivre.

crwdns2944171:0crwdnd2944171:0crwdnd2944171:0crwdnd2944171:0crwdne2944171:0