crwdns2933423:0crwdne2933423:0

Kit de habilidades electrónicas 101

crwdns2936315:0crwdne2936315:0
crwdns2936331:0crwdne2936331:0
crwdns2931653:06crwdne2931653:0
Electronics Skills Kit 101: crwdns2935265:00crwdnd2935265:01crwdnd2935265:03crwdne2935265:0 Electronics Skills Kit 101: crwdns2935265:00crwdnd2935265:02crwdnd2935265:03crwdne2935265:0 Electronics Skills Kit 101: crwdns2935265:00crwdnd2935265:03crwdnd2935265:03crwdne2935265:0
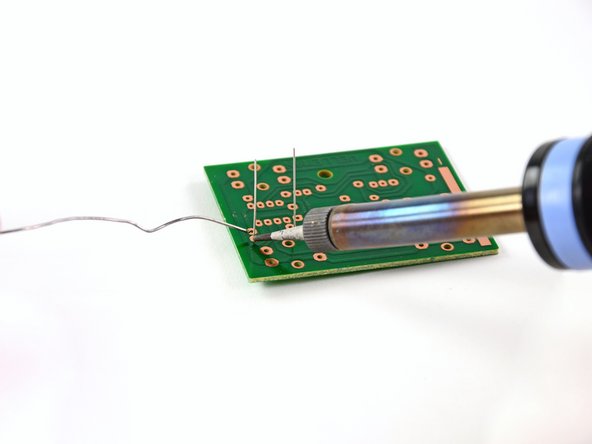
  • Here we are: the moment of truth. It's time to get that solder flowing.

  • Set the tip of the soldering iron on the two parts to be connected. In this case, that's the resistor lead and the copper trace on the circuit board.

  • Touch your solder to the tip of your soldering iron to melt it onto the joint. Don't hold it there for more than a second or two.

  • Quickly, but not frantically, pull both the soldering iron and the solder away from the joint.

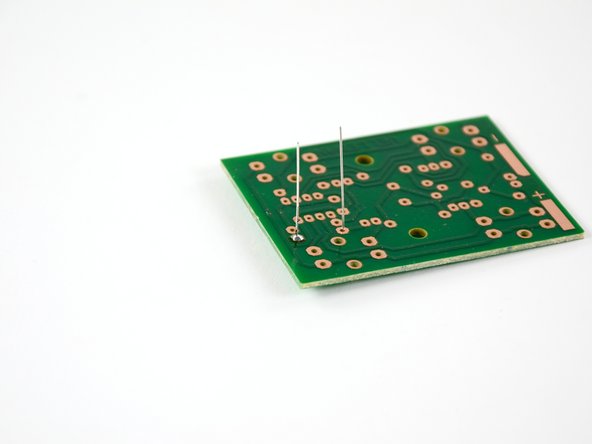
  • Your solder joint should be shiny and conical, and not expand beyond the copper trace.

Aquí estamos: el momento de la verdad. Es hora de que la soldadura fluya.

Coloca la punta del soldador en las dos partes a conectar. En este caso, ese es el cable de la resistencia y el rastro de cobre en la placa de circuito.

Toca la soldadura con la punta del soldador para derretirla en la unión. No lo sostenga sallí por más de un segundo o dos.

Rápidamente, pero no frenéticamente, tira tanto del soldador como de la soldadura para separarlos de la unión.

Su unión de soldadura debe ser brillante y cónica, y no expandirse más allá del rastro de cobre.

crwdns2944171:0crwdnd2944171:0crwdnd2944171:0crwdnd2944171:0crwdne2944171:0