crwdns2933423:0crwdne2933423:0

Elektronica-vaardigheden 101

crwdns2936315:0crwdne2936315:0
crwdns2936313:0crwdne2936313:0
crwdns2931653:04crwdne2931653:0
Electronics Skills Kit 101: crwdns2935265:00crwdnd2935265:01crwdnd2935265:02crwdne2935265:0 Electronics Skills Kit 101: crwdns2935265:00crwdnd2935265:02crwdnd2935265:02crwdne2935265:0
  • Place the leads of the resistor through the holes on either side of the rectangle marked R1 on the circuit board.

  • Resistors do not have to be installed in a particular orientation. Either lead can go into either hole.

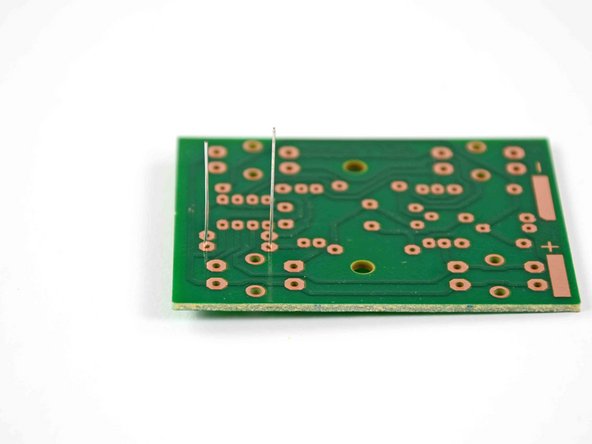
  • Turn the board over so that the copper traces are facing up and the resistor leads are pointing straight up in the air, as seen in the second picture.

  • You may also bend the leads outward to hold the resistor in place, but this is not necessary. As per NASA guidelines, any angle up to 30° down from vertical is acceptable.

Steek de draden van de weerstand door de gaten aan weerszijden van de rechthoek die op de printplaat met R1 gemarkeerd is.

Weerstanden hoeven niet in een bepaalde richting te worden geïnstalleerd. Elke draad kan in elk gat gestoken worden.

Draai de printplaat om zodat de koperen sporen naar boven wijzen en de weerstandsdraden recht omhoog staan, zoals te zien is in de tweede afbeelding.

Je kunt de draden ook naar buiten buigen om de weerstand op zijn plaats te houden, maar dit is niet nodig. Volgens NASA-richtlijnen is elke hoek tot 30° vanaf verticaal acceptabel.

crwdns2944171:0crwdnd2944171:0crwdnd2944171:0crwdnd2944171:0crwdne2944171:0