crwdns2931529:0crwdnd2931529:0crwdnd2931529:0crwdnd2931529:03crwdnd2931529:0crwdne2931529:0
crwdns2935425:02crwdne2935425:0
crwdns2931653:02crwdne2931653:0


-
Locate the four ribbon cables shown in the yellow highlighted areas.
-
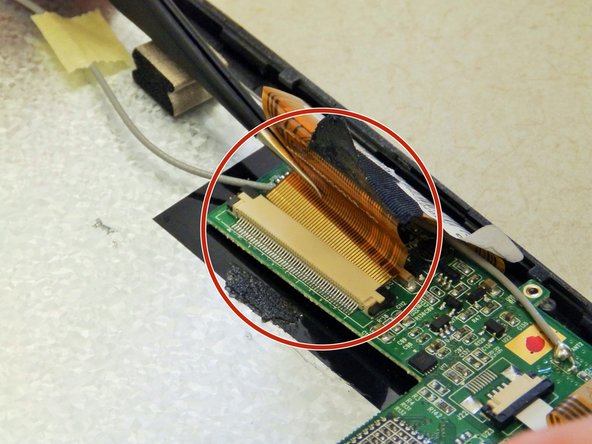
The digitizer is connected by a ZIF (zero insertion force) connector. The two black pieces on each end need to be pressed in simultaneously before the ribbon cable can be removed.
-
While pressing the black pieces, grasp the digitizer ribbon cable (widest one) with the tweezers and pull away from the connector as shown.
| [* yellow] Locate the four ribbon cables shown in the yellow highlighted areas. | |
| [* red] The digitizer is connected by a ZIF (zero insertion force) connector. The two black pieces on each end need to be pressed in simultaneously before the ribbon cable can be removed. | |
| - | [* red] While pressing the black pieces, grasp the digitizer ribbon cable (widest one) with the tweezers and pull away from the connector as shown. |
| + | [* red] While pressing the black pieces, grasp the digitizer ribbon cable (widest one) with the [product|IF145-020|tweezers] and pull away from the connector as shown. |
crwdns2944171:0crwdnd2944171:0crwdnd2944171:0crwdnd2944171:0crwdne2944171:0