crwdns2933423:0crwdne2933423:0

iPod 5th Generation (Video) Side Bumpers Replacement

crwdns2935425:01crwdne2935425:0

crwdns2936315:0crwdne2936315:0
crwdns2936321:0crwdne2936321:0
crwdns2931653:01crwdne2931653:0
iPod 5th Generation (Video) Side Bumpers Replacement: crwdns2935265:00crwdnd2935265:01crwdnd2935265:03crwdne2935265:0 iPod 5th Generation (Video) Side Bumpers Replacement: crwdns2935265:00crwdnd2935265:02crwdnd2935265:03crwdne2935265:0 iPod 5th Generation (Video) Side Bumpers Replacement: crwdns2935265:00crwdnd2935265:03crwdnd2935265:03crwdne2935265:0
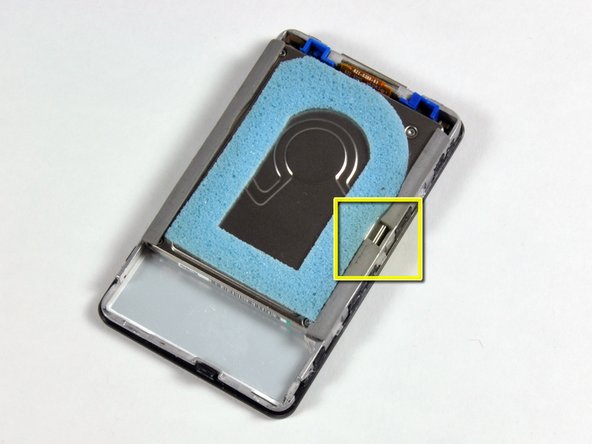
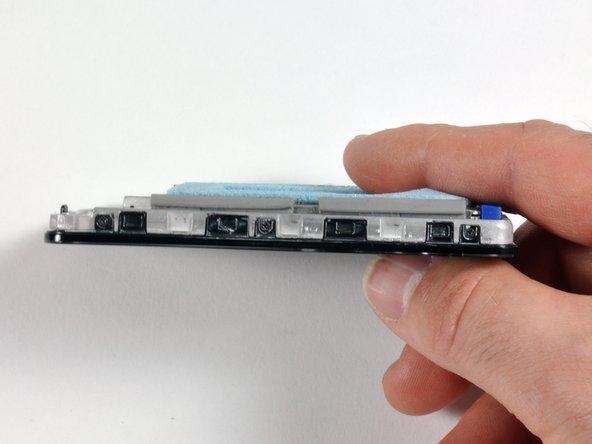
  • The rubber side bumpers should be installed as pictured:

  • The side of the drive that's being propped by the hard drive holding bracket should have the rubber side bumper that has a sidewall on the corner, as indicated by the red box.

  • There should be a space in between the two smaller rubber side bumpers, as indicated by the yellow box.

  • Both sides of the drive should be seated snugly, as shown in the third picture.

crwdns2935429:0crwdne2935429:0

crwdns2935429:0crwdne2935429:0

crwdns2935429:0crwdne2935429:0

crwdns2935429:0crwdne2935429:0

crwdns2944171:0crwdnd2944171:0crwdnd2944171:0crwdnd2944171:0crwdne2944171:0