crwdns2933423:0crwdne2933423:0

Reemplazo de las protecciones laterales del iPod 5ª Generación (Vídeo)

crwdns2935425:01crwdne2935425:0

crwdns2936315:0crwdne2936315:0
crwdns2936331:0crwdne2936331:0
crwdns2931653:01crwdne2931653:0
iPod 5th Generation (Video) Side Bumpers Replacement: crwdns2935265:00crwdnd2935265:01crwdnd2935265:03crwdne2935265:0 iPod 5th Generation (Video) Side Bumpers Replacement: crwdns2935265:00crwdnd2935265:02crwdnd2935265:03crwdne2935265:0 iPod 5th Generation (Video) Side Bumpers Replacement: crwdns2935265:00crwdnd2935265:03crwdnd2935265:03crwdne2935265:0
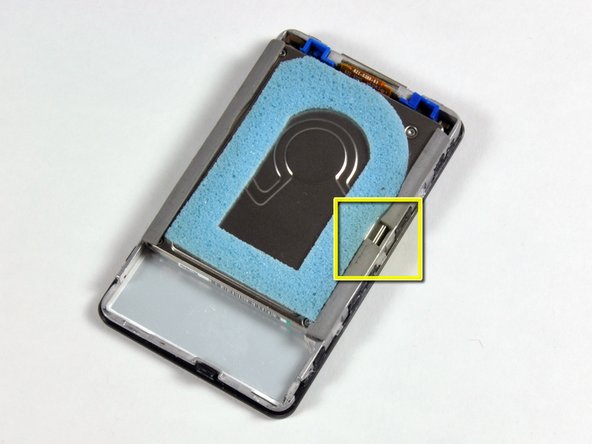
  • The rubber side bumpers should be installed as pictured:

  • The side of the drive that's being propped by the hard drive holding bracket should have the rubber side bumper that has a sidewall on the corner, as indicated by the red box.

  • There should be a space in between the two smaller rubber side bumpers, as indicated by the yellow box.

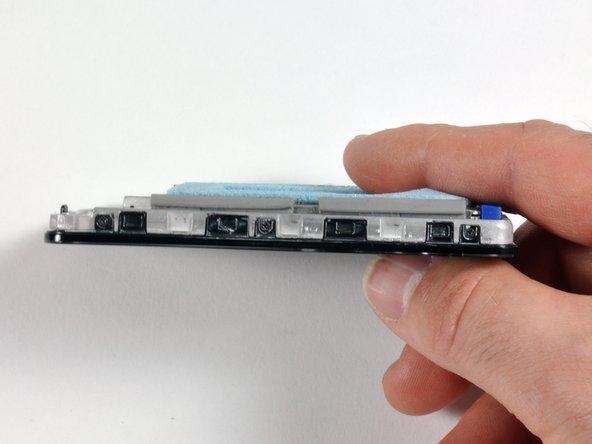
  • Both sides of the drive should be seated snugly, as shown in the third picture.

Los protectores laterales de goma deben instalarse como se muestra en la imagen:

El lado de la unidad que está siendo sostenido por el soporte de sujeción de la unidad de disco duro debe tener el protector lateral de goma que tiene una pared lateral en la esquina, como lo indica el cuadro rojo.

Debe haber un espacio entre las dos protecciones laterales de goma más pequeñas, como lo indica el cuadro amarillo.

Ambos lados de la unidad deben estar bien asentados, como se muestra en la tercera imagen.

crwdns2944171:0crwdnd2944171:0crwdnd2944171:0crwdnd2944171:0crwdne2944171:0