crwdns2933423:0crwdne2933423:0

iPod 第5世代(Video) ヘッドホンジャックとホールドスイッチの交換

crwdns2931527:0crwdnd2931527:0crwdnd2931527:0crwdnd2931527:0crwdne2931527:0

crwdns2936315:0crwdne2936315:0
crwdns2936323:0crwdne2936323:0
crwdns2931653:05crwdne2931653:0
iPod 5th Generation (Video) Headphone Jack & Hold Switch Replacement: crwdns2935265:00crwdnd2935265:01crwdnd2935265:02crwdne2935265:0 iPod 5th Generation (Video) Headphone Jack & Hold Switch Replacement: crwdns2935265:00crwdnd2935265:02crwdnd2935265:02crwdne2935265:0
  • If your replacement headphone jack includes the white plastic hold switch, simply reinstall the headphone jack. If your replacement part does not include the plastic hold switch, follow the next steps to transfer the plastic hold switch to your new headphone jack.

  • If you're just trying to remove the rear panel, you can skip Steps 15 and 16.

  • Remove the single Phillips screw nearest to the hold switch. Note: You may find adhesive holding the back of the screw in place.

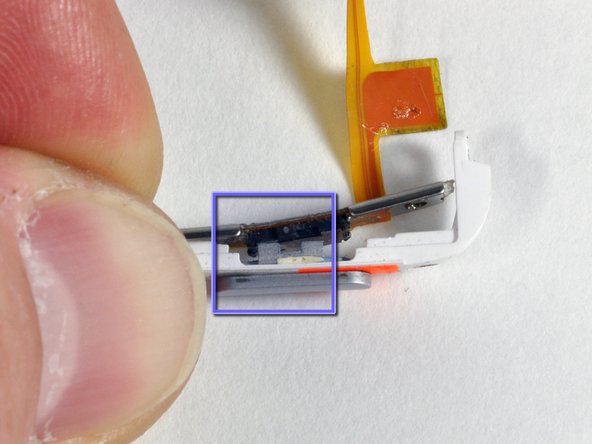
  • Lift the plastic portion of the Hold switch away from the orange ribbon cable.

  • Ensure that the black notch lines up with the gray slider during reassembly of the switch (see picture 2).

交換用ヘッドフォンジャックに白いプラスチック製ホールドスイッチが含まれている場合は、ヘッドフォンジャックを再装着するだけです。交換パーツにプラスチック製のホールドスイッチが含まれていない場合は、次の手順でプラスチック製のホールドスイッチを新しいヘッドホンジャックに移植してください。

リアパネルを取り外すだけなら、手順15と16はスキップすることができます。

ホールドスイッチに一番近いプラスネジ1本を外します。注意:ネジの裏側に接着剤が付着している場合があります。

ホールドスイッチのプラスチック部分を持ち上げて、オレンジ色のリボンケーブルから離します。

スイッチを再組み立てする際、黒い切り欠きがグレーのスライダーと並行していることを確認してください(写真2参照)。

crwdns2944171:0crwdnd2944171:0crwdnd2944171:0crwdnd2944171:0crwdne2944171:0