crwdns2931529:0crwdnd2931529:0crwdnd2931529:0crwdnd2931529:02crwdnd2931529:0crwdne2931529:0
crwdns2935425:03crwdne2935425:0
crwdns2931653:03crwdne2931653:0


-
On the bottom of the OnHub is two screws holding the casing to the base.
-
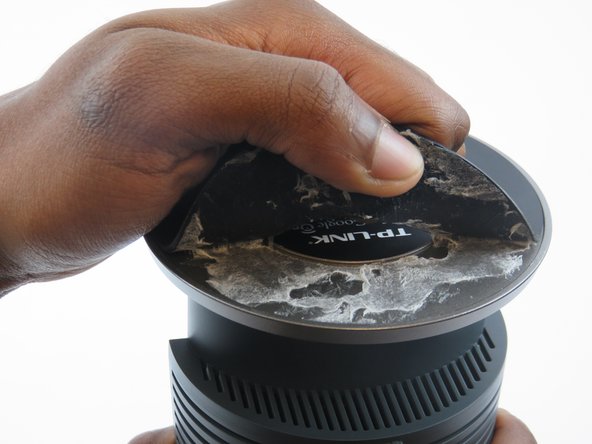
To access these screws, you must remove the rubber pad that is glued to the base.
-
To remove the pad, slide a metal spudger under the edge of the pad. Pry the pad away from the base, removing the glue.
-
Once the pad is pulled up enough to grab, peel it the rest of the way exposing the screws.
crwdns2944171:0crwdnd2944171:0crwdnd2944171:0crwdnd2944171:0crwdne2944171:0