crwdns2933423:0crwdne2933423:0

Sostituzione ventola destra MacBook Pro 15" Unibody inizio 2011

crwdns2931529:0crwdnd2931529:0crwdnd2931529:0crwdnd2931529:02crwdnd2931529:0crwdne2931529:0

crwdns2935425:01crwdne2935425:0

crwdns2936315:0crwdne2936315:0
crwdns2936321:0crwdne2936321:0
crwdns2931653:01crwdne2931653:0
MacBook Pro 15" Unibody Early 2011 Right Fan Replacement: crwdns2935265:00crwdnd2935265:01crwdnd2935265:03crwdne2935265:0 MacBook Pro 15" Unibody Early 2011 Right Fan Replacement: crwdns2935265:00crwdnd2935265:02crwdnd2935265:03crwdne2935265:0 MacBook Pro 15" Unibody Early 2011 Right Fan Replacement: crwdns2935265:00crwdnd2935265:03crwdnd2935265:03crwdne2935265:0
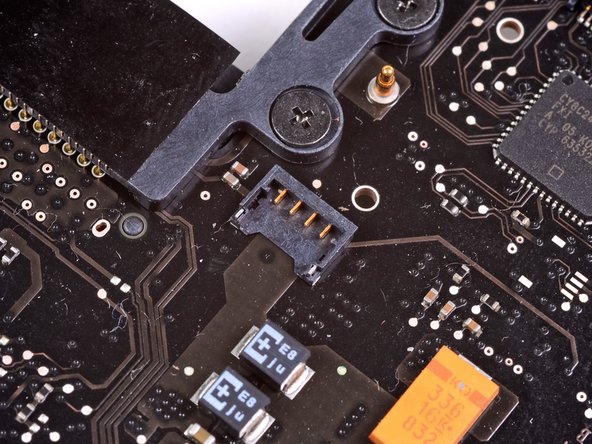
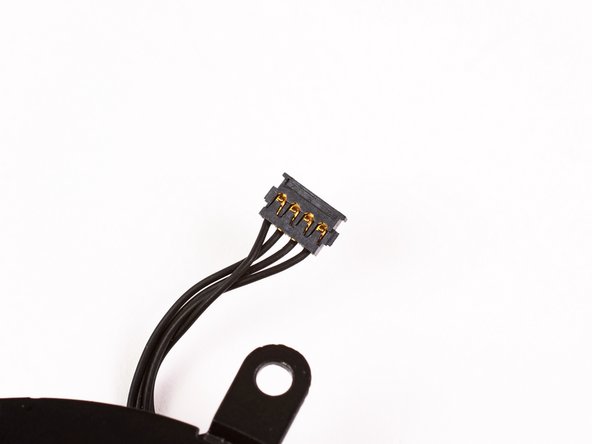
  • Use a spudger to pry the fan connector straight up off the logic board.

  • It is useful to twist the spudger axially from beneath the fan cable wires to release the connector.

  • The fan socket and the fan connector can be seen in the second and third pictures. Be careful not to break the plastic fan socket off the logic board as you use your spudger to lift the fan connector straight up and out of its socket. The layout of the logic board shown in the second picture may look slightly different than your machine but the fan socket is the same.

Usa uno spudger per sollevare dalla scheda logica il connettore della ventola.

Per staccare il connettore, può essere utile torcere lo spudger sul suo asse da sotto i cavi della ventola.

Lo zoccolo e il connettore della ventola sono visibili nella seconda e terza foto. Stai attento non rompere il socket di plastica della ventola sulla scheda logica quando usi lo spudger per alzare il connettore. La scheda logica della tua macchina può avere un layout un po' diverso rispetto a quella nella seconda foto, ma lo zoccolo è uguale.

crwdns2944171:0crwdnd2944171:0crwdnd2944171:0crwdnd2944171:0crwdne2944171:0