crwdns2935425:03crwdne2935425:0
crwdns2931653:03crwdne2931653:0


-
Now we have access to the internals of the laptop, pretty neat
-
If the battery is away from you, the hard drive should be closer towards you on the left
-
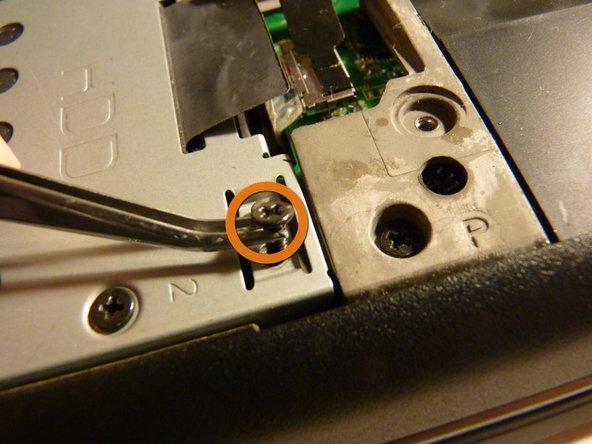
Start by removing the screws holding the caddy into the chassis
-
These screws have a more rounded top, and are longer
-
Once loosened, you can remove with your fingers or tweezers, and then set them aside
| [* black] Now we have access to the internals of the laptop, pretty neat | |
| [* black] If the battery is away from you, the hard drive should be closer towards you on the left | |
| [* violet] Start by removing the screws holding the caddy into the chassis | |
| [* black] These screws have a more rounded top, and are longer | |
| - | [* orange] Once loosened, you can remove with your fingers or tweezers, and then set them aside |
| + | [* orange] Once loosened, you can remove with your fingers or [product|IF145-020|tweezers], and then set them aside |
crwdns2944171:0crwdnd2944171:0crwdnd2944171:0crwdnd2944171:0crwdne2944171:0