crwdns2933423:0crwdne2933423:0

Desmontaje exploratorio de Beats Studio 2.0

crwdns2936315:0crwdne2936315:0
crwdns2936331:0crwdne2936331:0
crwdns2931653:03crwdne2931653:0
Beats Studio 2.0 Exploratory Teardown, Method for separating outer plastic pieces: crwdns2935265:00crwdnd2935265:01crwdnd2935265:03crwdne2935265:0 Beats Studio 2.0 Exploratory Teardown, Method for separating outer plastic pieces: crwdns2935265:00crwdnd2935265:02crwdnd2935265:03crwdne2935265:0 Beats Studio 2.0 Exploratory Teardown, Method for separating outer plastic pieces: crwdns2935265:00crwdnd2935265:03crwdnd2935265:03crwdne2935265:0
Method for separating outer plastic pieces
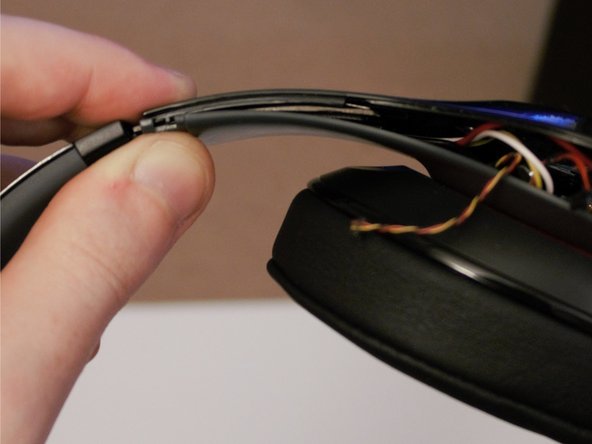
  • By putting a thin spudger between the two halves of the plastic container, it is fairly easy to separate the two halves. But the top likely won't come apart without a fight. There are two primary pieces to keep in mind:

  • The small clips that show "L and "R" should probably be removed before the two pieces are separated. They are clipped into the outer shell and adhered with a similar adhesive to the outer rings that were previously removed. The trick: spread one side outwards as you are prying the broad section away from the rest of the shell.

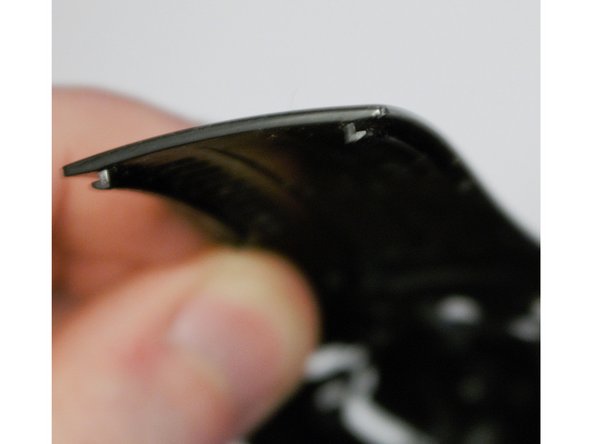
  • Now to the main issue: there are deep "tracks" that clip the two halves together. I haven't been able to use a technique to make this easier, as you cannot "slide" the two halves apart. Just like the L/R clips, concentrate on stretching the inner (grey) part as much as possible. Force will be necessary; leave a comment if a better way is found.

  • You may be able to separate these pieces once or twice, but they do bend slightly and eventually the rails will deform, making reassembly impossible without modification.

Al colocar un spudger delgado entre las dos mitades del recipiente de plástico, es bastante fácil separar las dos mitades. Pero es probable que la parte superior no se desmonte sin luchar. Hay dos piezas principales a tener en cuenta:

Los pequeños clips que muestran "L y "R" deberían quitarse antes de separar las dos piezas. Se enganchan en la carcasa exterior y se adhieren con un adhesivo similar a los anillos exteriores que se quitaron previamente. El truco: separa un lado hacia afuera a medida que haces palanca para separar la sección ancha del resto del caparazón.

Hay "pistas" profundas que unen las dos mitades. No he podido usar una técnica para hacer esto más fácil, ya que no puedes "deslizar" las dos mitades para separarlas. Al igual que con los clips L/R, concéntrate en estirar la parte interior (gris) tanto como sea posible. La fuerza será necesaria; deja un comentario si encuentras una mejor manera.

Es posible que puedas separar estas piezas una o dos veces, pero se doblan ligeramente y eventualmente los rieles se deformarán, lo que imposibilitará el montaje sin modificaciones.

crwdns2944171:0crwdnd2944171:0crwdnd2944171:0crwdnd2944171:0crwdne2944171:0