crwdns2933423:0crwdne2933423:0

Garmin Vivosmart Teardown

crwdns2936315:0crwdne2936315:0
crwdns2936323:0crwdne2936323:0
crwdns2931653:04crwdne2931653:0
Garmin Vivosmart Teardown, Remove the PCB Assembly: crwdns2935265:00crwdnd2935265:01crwdnd2935265:03crwdne2935265:0 Garmin Vivosmart Teardown, Remove the PCB Assembly: crwdns2935265:00crwdnd2935265:02crwdnd2935265:03crwdne2935265:0 Garmin Vivosmart Teardown, Remove the PCB Assembly: crwdns2935265:00crwdnd2935265:03crwdnd2935265:03crwdne2935265:0
Remove the PCB Assembly
  • To remove the electronics from the hard plastic base we need to dig out a lot more sealant.

  • I first pried up the end of the PCB near the USB interface.

  • Notice the spring contacts coming from the 4 USB conductor pads - these come in contact with pads on the PCB.

  • Finally (pic 2) the electrical assembly is free! Three rigid boards connected by flex.

  • Check out the antenna built into the flex circuitry - looks like a PIFA.

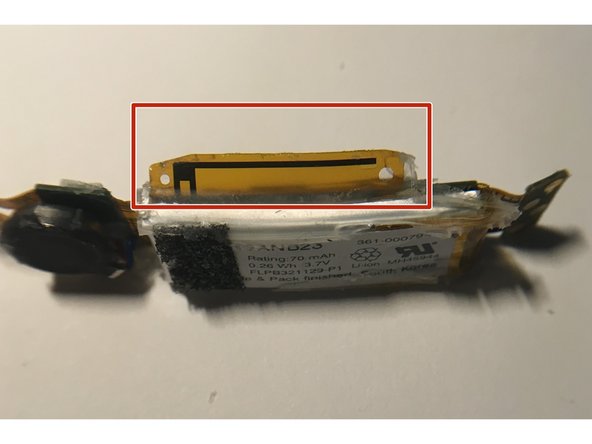
  • You can keep prying and release the

  • 70mAh Li-ion battery

  • and buzzer.

crwdns2935429:0crwdne2935429:0

crwdns2935429:0crwdne2935429:0

crwdns2935429:0crwdne2935429:0

crwdns2935429:0crwdne2935429:0

crwdns2935429:0crwdne2935429:0

crwdns2935429:0crwdne2935429:0

crwdns2935429:0crwdne2935429:0

crwdns2935429:0crwdne2935429:0

crwdns2944171:0crwdnd2944171:0crwdnd2944171:0crwdnd2944171:0crwdne2944171:0