crwdns2933423:0crwdne2933423:0

Appleスマートバッテリーケースの分解

crwdns2936315:0crwdne2936315:0
crwdns2936323:0crwdne2936323:0
crwdns2931653:06crwdne2931653:0
Smart Battery Case Teardown: crwdns2935265:00crwdnd2935265:01crwdnd2935265:03crwdne2935265:0 Smart Battery Case Teardown: crwdns2935265:00crwdnd2935265:02crwdnd2935265:03crwdne2935265:0 Smart Battery Case Teardown: crwdns2935265:00crwdnd2935265:03crwdnd2935265:03crwdne2935265:0
  • A tiny hole in the microfiber lets the LED charging indicator shine through—an indicator you'll only actually see if you're charging your battery case without an iPhone in it.

  • So, approximately never.

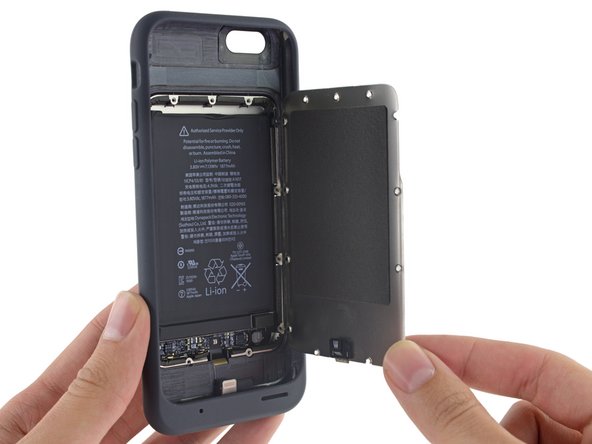
  • Having unearthed a set of (unexpected!) T3 Torx screws, we get to work doing what we do best!

  • Today's screw-turning action is brought to you courtesy of our new 64 Bit Driver Kit.

  • This metal plate is a handy door into the battery compartment, and serves to both stiffen the case and protect the battery.

マイクロファイバーの小さな穴はLEDを中から点灯させて充電中の表示ランプとなります。iPhone本体なしでバッテリーケースのみに充電をした場合でも実際に表示ランプは点灯します。

(意外なことに!)T3トルクスネジが埋め込まれているので、ベストをつくしてやってみましょう!

今回の分解にはiFixitの新商品である64Bit Driver Kitを使用しています。

このメタルプレートはバッテリー内部に続く扉です。ケースを強化し、バッテリーを守る役割を担っています。

crwdns2944171:0crwdnd2944171:0crwdnd2944171:0crwdnd2944171:0crwdne2944171:0