crwdns2933423:0crwdne2933423:0

Smontaggio Fairphone 2

crwdns2936315:0crwdne2936315:0
crwdns2936321:0crwdne2936321:0
crwdns2931653:04crwdne2931653:0
Fairphone 2 Teardown: crwdns2935265:00crwdnd2935265:01crwdnd2935265:03crwdne2935265:0 Fairphone 2 Teardown: crwdns2935265:00crwdnd2935265:02crwdnd2935265:03crwdne2935265:0 Fairphone 2 Teardown: crwdns2935265:00crwdnd2935265:03crwdnd2935265:03crwdne2935265:0
  • The lack of visible screws had us a little worried, but not for long thanks to these handily-labeled clips.

  • Removing the display assembly is simply a matter of flipping the switches and sliding the panel out.

  • For those keeping score thus far, removing the front panel keeps us at a grand total of zero tools required.

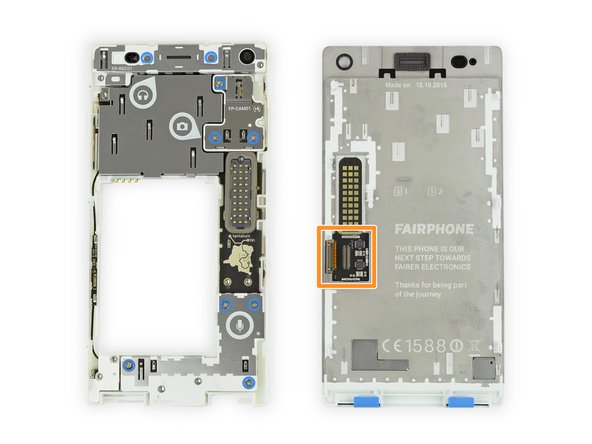
  • On the midframe we find an array of pogo pins, their counter parts are on the back of the display assembly.

  • Immediately below the contact pads on the display assembly we take off the metal shield and see where the display connects to the breakout board.

  • Fairphone modularized off-the-shelf components using breakout boards like these to foster compatibility.

L'assenza di viti a vista ci preoccupa, ma non per molto grazie a queste clip in bella evidenza.

La rimozione del gruppo display è semplicemente questione di spingere le clip e far scorrere fuori il pannello.

Per chi stia tenendo i punti, con la rimozione del pannello frontale siamo ancora a zero utensili necessari.

Nel telaio centrale troviamo una serie di contatti tipo pogo pin, le cui controparti si trovano sul retro del gruppo display.

Immediatamente sotto i contatti del gruppo display, togliamo la schermatura metallica per vedere dove il display si collega alla breakout board, la semplice scheda stampata intermedia.

Fairphone ha reso modulari i componenti standard utilizzando delle breakout board come queste per incrementare la compatibilità.

crwdns2944171:0crwdnd2944171:0crwdnd2944171:0crwdnd2944171:0crwdne2944171:0