crwdns2935425:011crwdne2935425:0
crwdns2931653:011crwdne2931653:0

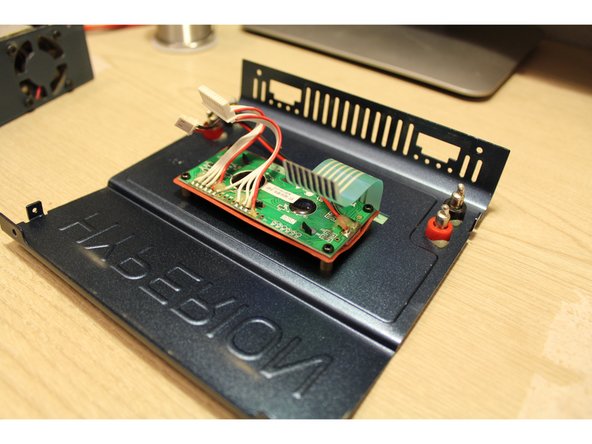


Separate Upper and Lower Portions
-
The top faceplate can now be separated from the lower charger assembly.
-
Inside you'll find:
-
PIC24HJ128GP310 16-bit Microcontroller
-
PIC ICSP Programming Pins (6 Pins)
-
KA324AD Quad Operational Amplifiers (4 total)
-
24LC32A 32K I2C Serial EEPROM
crwdns2944171:0crwdnd2944171:0crwdnd2944171:0crwdnd2944171:0crwdne2944171:0