crwdns2933423:0crwdne2933423:0

Remplacement du panneau avant du Nabi DreamTab HD8

crwdns2931529:0crwdnd2931529:0crwdnd2931529:0crwdnd2931529:04crwdnd2931529:0crwdne2931529:0

crwdns2936315:0crwdne2936315:0
crwdns2936317:0crwdne2936317:0
crwdns2931653:06crwdne2931653:0
Nabi DreamTab HD8 Front Panel Assembly Replacement: crwdns2935265:00crwdnd2935265:01crwdnd2935265:03crwdne2935265:0 Nabi DreamTab HD8 Front Panel Assembly Replacement: crwdns2935265:00crwdnd2935265:02crwdnd2935265:03crwdne2935265:0 Nabi DreamTab HD8 Front Panel Assembly Replacement: crwdns2935265:00crwdnd2935265:03crwdnd2935265:03crwdne2935265:0
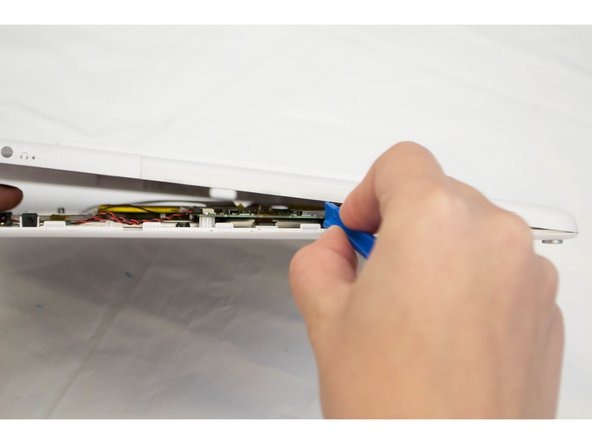
  • Rotate the top of the device towards you so that the audio jack appears on the right side of the device.

  • The audio jack will have a small symbol of headphones next to a small 3.5mm diameter hole.

  • Wedge the plastic opening tool between where the front and back case panels meet near the audio jack.

  • Pry the device open using moderate force until you hear a clicking sound. This is the sound of the clips unlocking.

  • Move along the perimeter of the entire device using the same prying motion to gradually separate the front and back panels.

  • Once the edges are open return to the same starting position next to the audio jack.

  • During this step, you may crack some parts of the case. Gently pry around the speakers, audio jack and charging cable ports to reduce this damage.

Faites pivoter la partie supérieure de l'appareil vers vous afin que la prise audio apparaisse à droite de l'appareil.

La prise audio aura un petit symbole d'écouteur à côté d'un petit trou de 3,5 mm de diamètre.

Calez l'outil d'ouverture en plastique entre les endroits où les panneaux avant et arrière se rejoignent près de la prise audio.

Soulever l'appareil en utilisant une force modérée jusqu'à ce que vous entendiez un déclic. C'est le son du déverrouillage des clips.

Déplacez-vous le long du périmètre de l'appareil en utilisant le même mouvement de levier pour séparer progressivement les panneaux avant et arrière.

Une fois les bords ouverts, revenez à la même position de départ à côté de la prise audio.

Au cours de cette étape, vous pouvez craquer certaines parties du boîtier. Faites doucement levier sur les haut-parleurs, la prise audio et les ports du câble de charge pour réduire ces dommages.

crwdns2944171:0crwdnd2944171:0crwdnd2944171:0crwdnd2944171:0crwdne2944171:0