crwdns2933423:0crwdne2933423:0

Disassembling Creative ZEN Screen and Battery

crwdns2936315:0crwdne2936315:0
crwdns2936323:0crwdne2936323:0
crwdns2931653:08crwdne2931653:0
Disassembling Creative ZEN Screen and Battery: crwdns2935265:00crwdnd2935265:01crwdnd2935265:03crwdne2935265:0 Disassembling Creative ZEN Screen and Battery: crwdns2935265:00crwdnd2935265:02crwdnd2935265:03crwdne2935265:0 Disassembling Creative ZEN Screen and Battery: crwdns2935265:00crwdnd2935265:03crwdnd2935265:03crwdne2935265:0
  • There are four more "A" screws on the sides of the device, circled in green. Remove them and put them in the "A" pile.

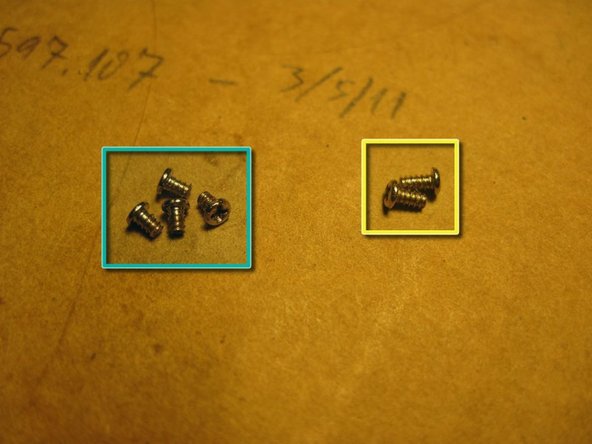
  • The two screws circled in yellow are type "B" screws. Remove them and put them in a separate pile.

  • The 3rd pic shows the difference between "A" screws (left) and "B" screws (right). There are 8 "A" and 2 "B".

crwdns2935429:0crwdne2935429:0

crwdns2935429:0crwdne2935429:0

crwdns2935429:0crwdne2935429:0

crwdns2944171:0crwdnd2944171:0crwdnd2944171:0crwdnd2944171:0crwdne2944171:0