crwdns2931527:0crwdnd2931527:0crwdnd2931527:0crwdnd2931527:0crwdne2931527:0
crwdns2935425:04crwdne2935425:0
crwdns2931653:04crwdne2931653:0


-
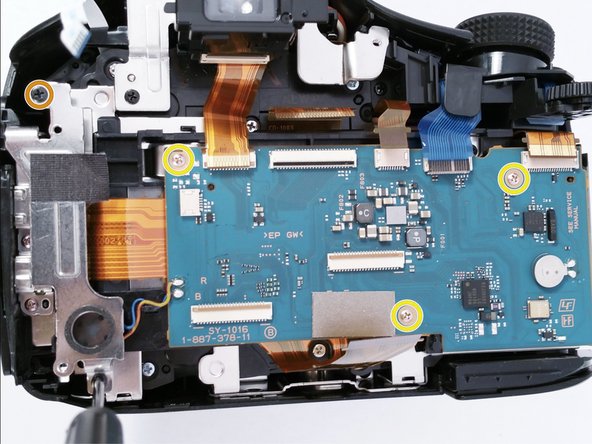
Carefully remove the 7 ribbon wires connected to the mother board.
-
Remove the 2 (5 cm) Phillips head screws on the speaker mounting bracket.
-
Remove the 3 (4 cm) Phillips head screws that secure the motherboard to the camera.
-
Lift up on the speaker mounting bracket to remove it.
| - | [* |
|---|---|
| - | [* |
| - | [* |
| + | [* red] Carefully remove the 7 ribbon wires connected to the mother board. |
| + | [* orange] Remove the 2 (5 cm) Phillips head screws on the speaker mounting bracket. |
| + | [* yellow] Remove the 3 (4 cm) Phillips head screws that secure the motherboard to the camera. |
| [* green] Lift up on the speaker mounting bracket to remove it. |
crwdns2944171:0crwdnd2944171:0crwdnd2944171:0crwdnd2944171:0crwdne2944171:0