crwdns2933423:0crwdne2933423:0

iPod touch 第4世代 30 ピンDockコネクタの修理方法

crwdns2936315:0crwdne2936315:0
crwdns2936323:0crwdne2936323:0
crwdns2931653:07crwdne2931653:0
iPod Touch 4th Generation 30 Pin Dock Connector Replacement: crwdns2935265:00crwdnd2935265:01crwdnd2935265:03crwdne2935265:0 iPod Touch 4th Generation 30 Pin Dock Connector Replacement: crwdns2935265:00crwdnd2935265:02crwdnd2935265:03crwdne2935265:0 iPod Touch 4th Generation 30 Pin Dock Connector Replacement: crwdns2935265:00crwdnd2935265:03crwdnd2935265:03crwdne2935265:0
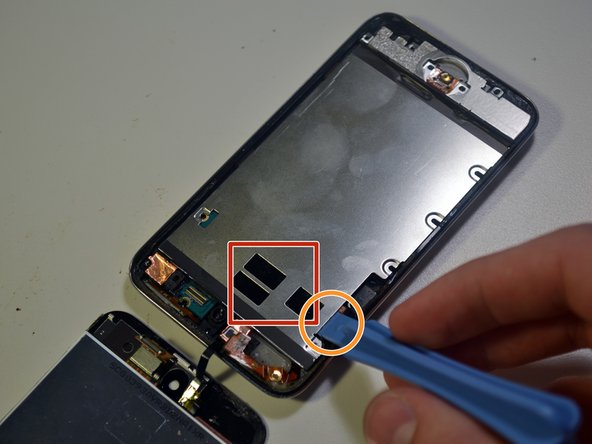
  • Insert the edge of a plastic opening tool under the EMI Shield near the bottom left corner of the Touch.

  • Pry upward to separate the plate from the adhesive securing it to the plastic inner case.

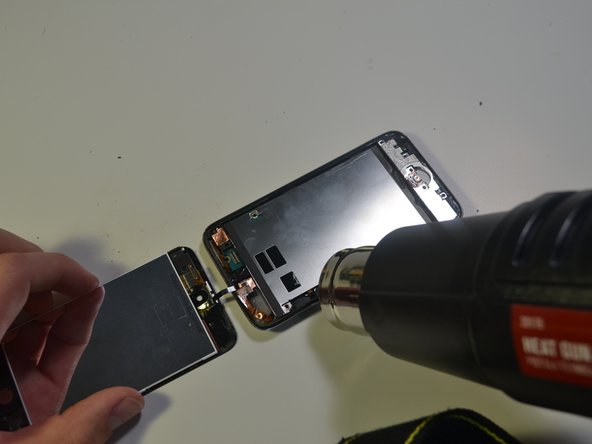
  • If the shield is still attached to the logic board, warm this area with a heat gun to loosen the adhesive, then separate the shield from the logic board using the opening tool.

  • There is a very thin ribbon cable here that connects the volume and power buttons to the logic board. Be careful when prying in this location as the cable is very fragile and could rip.

本体の左下隅にあるEMIシールドの下にプ開口ツールを差し込みます。

プレートの接着剤を剥がして、プラスチックの内側ケースに固定します。

EMIシールドがまだロジックボードから取れない場合は、この部分をヒートガンで暖めて接着剤を柔らかくし、開口ツールを使用してシールドをロジックボードから取り外します。

ここでは音量調節ボタンと電源ボタンをロジックボードに接続する非常に薄いリボンケーブルがあります。ケーブルが非常に壊れやすく、破損する可能性があるので、この手順では注意してください。

crwdns2944171:0crwdnd2944171:0crwdnd2944171:0crwdnd2944171:0crwdne2944171:0