crwdns2933423:0crwdne2933423:0

Motorola Xoom Teardown

crwdns2936315:0crwdne2936315:0
crwdns2936323:0crwdne2936323:0
crwdns2931653:04crwdne2931653:0
Motorola Xoom Teardown: crwdns2935265:00crwdnd2935265:01crwdnd2935265:03crwdne2935265:0 Motorola Xoom Teardown: crwdns2935265:00crwdnd2935265:02crwdnd2935265:03crwdne2935265:0 Motorola Xoom Teardown: crwdns2935265:00crwdnd2935265:03crwdnd2935265:03crwdne2935265:0
  • Moving right along, lets get this thing open!

  • Two T5 Torx screws located near the Micro USB and Micro-HDMI ports secure the rear case to the Xoom.

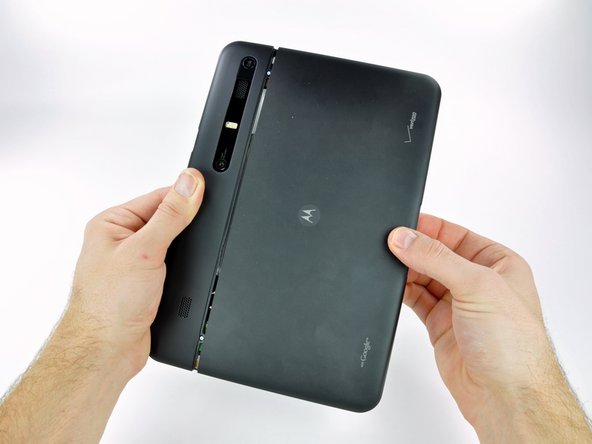
  • Like a sliding glass door, the rear case slides off part way, and we get our first peek at what makes this tablet tick.

  • Major props to Motorola here. For the first time we didn't need any prying tools to get into a tablet.

  • Unfortunately, the rear panel of the Xoom will only slide so far until two catch clips impede our progress. At this point what appears to be the Wi-Fi module can easily be removed. This card will probably be replaced should you ever choose to send your Xoom to Motorola for a 4G LTE upgrade.

crwdns2935429:0crwdne2935429:0

crwdns2935429:0crwdne2935429:0

crwdns2935429:0crwdne2935429:0

crwdns2935429:0crwdne2935429:0

crwdns2935429:0crwdne2935429:0

crwdns2944171:0crwdnd2944171:0crwdnd2944171:0crwdnd2944171:0crwdne2944171:0