crwdns2933423:0crwdne2933423:0

Remplacement du boitier avant du Olympus FE-210

crwdns2931529:0crwdnd2931529:0crwdnd2931529:0crwdnd2931529:05crwdnd2931529:0crwdne2931529:0

crwdns2935425:02crwdne2935425:0

crwdns2936315:0crwdne2936315:0
crwdns2936317:0crwdne2936317:0
crwdns2931653:02crwdne2931653:0
Removing Olympus FE-210 Front Casing: crwdns2935265:00crwdnd2935265:01crwdnd2935265:03crwdne2935265:0 Removing Olympus FE-210 Front Casing: crwdns2935265:00crwdnd2935265:02crwdnd2935265:03crwdne2935265:0 Removing Olympus FE-210 Front Casing: crwdns2935265:00crwdnd2935265:03crwdnd2935265:03crwdne2935265:0
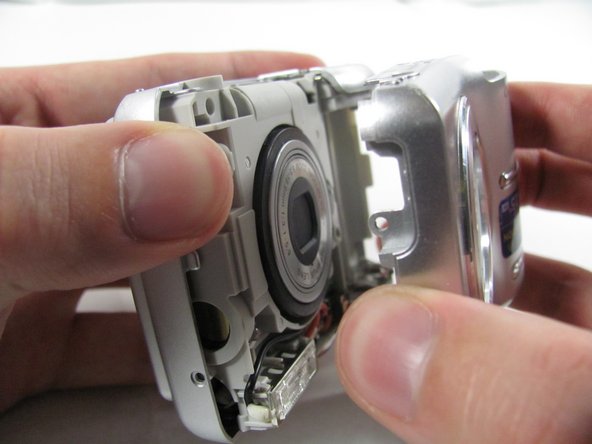
  • Pulling the front case off, requires applying enough strength in the right areas.

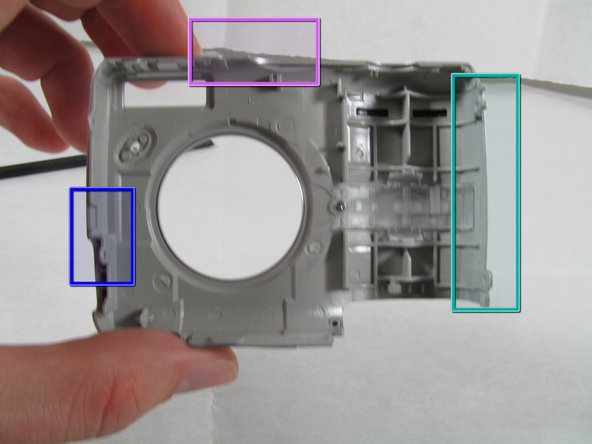
  • The front case snaps into place in three places:

  • At the top and bottom of the battery side (opposite of side pictured) of the case.

  • Right in the middle of the DC-in side (side pictured) of the case.

  • Top of the camera, to the left of the power button.

  • Once those places are disconnected, the front case will pop right off.

  • The camera in the first two pictures is upside down. This is the best position to place your thumbs to remove the case.

Pour retirer le boîtier avant, il faut appliquer suffisamment de force dans les bonnes zones.

Le boîtier avant s'enclenche à trois endroits:

En haut et en bas du côté batterie (à l'opposé des photos latérales) du boîtier.

Juste au milieu du côté DC-in (photos latérales) du boîtier.

Haut de la caméra, à gauche du bouton d'alimentation.

Une fois que ces endroits sont déconnectés, le boîtier avant apparaîtra tout de suite.

L'appareil photo des deux premières images est à l'envers. C'est la meilleure position pour placer vos pouces pour retirer l'étui.

crwdns2944171:0crwdnd2944171:0crwdnd2944171:0crwdnd2944171:0crwdne2944171:0