crwdns2933423:0crwdne2933423:0

MacBook Air 13" Ende 2010 Displayeinheit austauschen

crwdns2931527:0crwdnd2931527:0crwdnd2931527:0crwdnd2931527:0crwdne2931527:0

crwdns2935425:05crwdne2935425:0

crwdns2936315:0crwdne2936315:0
crwdns2936319:0crwdne2936319:0
crwdns2931653:05crwdne2931653:0
MacBook Air 13" Late 2010 Display Assembly Replacement: crwdns2935265:00crwdnd2935265:01crwdnd2935265:02crwdne2935265:0 MacBook Air 13" Late 2010 Display Assembly Replacement: crwdns2935265:00crwdnd2935265:02crwdnd2935265:02crwdne2935265:0
  • Push the upper case slightly toward the display assembly, then rotate it away from the front of the display assembly.

  • Once the two display hinges have cleared the upper case, remove the display and set it aside.

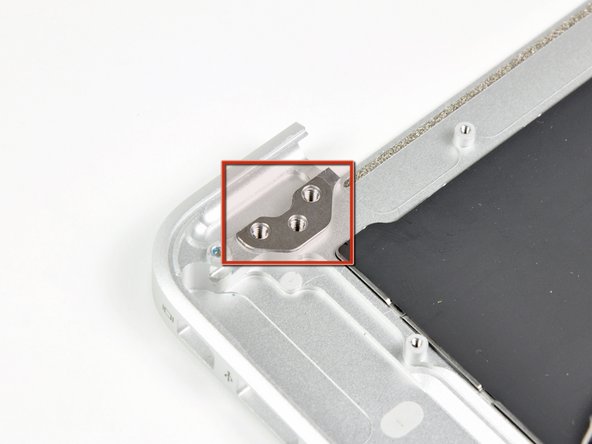
  • Keep track of the shims under each of the two display brackets. When installing the display, be sure a shim is installed under each display bracket (against the upper case) as shown in the second picture.

Schiebe den oberen Gehäuseteil leicht in Richtung der Displayeinheit und drehe es dann weg von der Vorderseite der Displayeinheit.

Sobald die beiden Displayscharniere es erlauben, entferne das Display und lege es beiseite.

Achte auf die beiden Unterlegscheiben unter jeder Displayhalterung. Beim Zusammenbau musst du jeweils eine Unterlegscheibe unter jeder Displayhalterung einsetzen (im oberen Gehäuse), so wie im zweiten Bild gezeigt.

crwdns2944171:0crwdnd2944171:0crwdnd2944171:0crwdnd2944171:0crwdne2944171:0