crwdns2933423:0crwdne2933423:0

MacBook Air 11" Late 2010 Display Assembly Replacement

crwdns2931529:0crwdnd2931529:0crwdnd2931529:0crwdnd2931529:02crwdnd2931529:0crwdne2931529:0

crwdns2935425:07crwdne2935425:0

crwdns2936315:0crwdne2936315:0
crwdns2936321:0crwdne2936321:0
crwdns2931653:07crwdne2931653:0
MacBook Air 11" Late 2010 Display Assembly Replacement: crwdns2935265:00crwdnd2935265:01crwdnd2935265:02crwdne2935265:0 MacBook Air 11" Late 2010 Display Assembly Replacement: crwdns2935265:00crwdnd2935265:02crwdnd2935265:02crwdne2935265:0
  • Push the upper case slightly toward the display assembly, then rotate it away from the front of the display assembly.

  • Once the two display hinges have cleared the upper case, remove the display and set it aside.

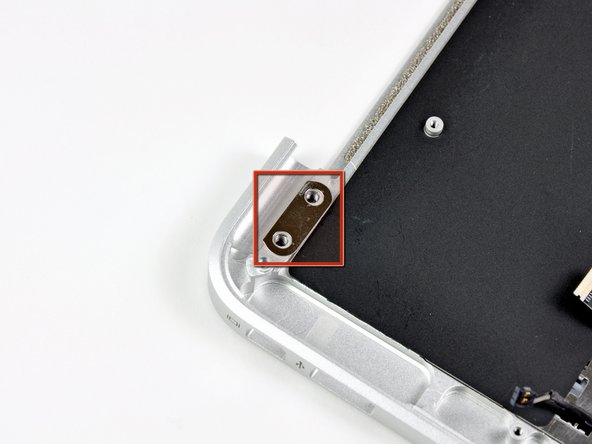
  • Keep track of the shims under each of the two display brackets. When installing the display, be sure a shim is installed under each display bracket (against the upper case) as shown in the third picture.

crwdns2935429:0crwdne2935429:0

crwdns2935429:0crwdne2935429:0

crwdns2935429:0crwdne2935429:0

crwdns2944171:0crwdnd2944171:0crwdnd2944171:0crwdnd2944171:0crwdne2944171:0