crwdns2933423:0crwdne2933423:0

Reemplazo del bisel de la pantalla trasera de 15" 1.67 GHz de aluminio PowerBook G4

crwdns2931529:0crwdnd2931529:0crwdnd2931529:0crwdnd2931529:02crwdnd2931529:0crwdne2931529:0

crwdns2936315:0crwdne2936315:0
crwdns2936331:0crwdne2936331:0
crwdns2931653:03crwdne2931653:0
PowerBook G4 Aluminum 15" 1.67 GHz Rear Display Bezel Replacement: crwdns2935265:00crwdnd2935265:01crwdnd2935265:03crwdne2935265:0 PowerBook G4 Aluminum 15" 1.67 GHz Rear Display Bezel Replacement: crwdns2935265:00crwdnd2935265:02crwdnd2935265:03crwdne2935265:0 PowerBook G4 Aluminum 15" 1.67 GHz Rear Display Bezel Replacement: crwdns2935265:00crwdnd2935265:03crwdnd2935265:03crwdne2935265:0
  • The next few steps require the use of plastic opening tools and spudgers that will probably be destroyed in the process. Have a few spares of each tool handy.

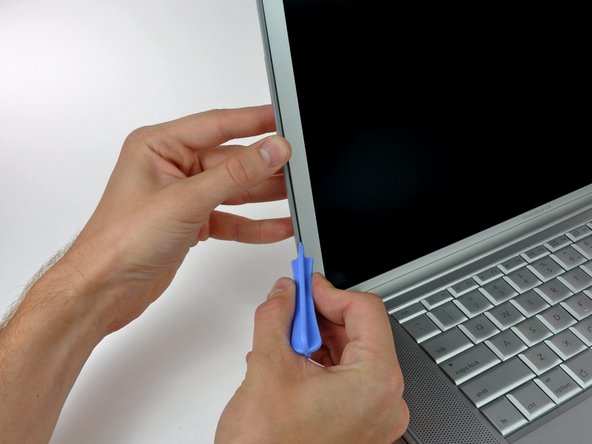
  • Insert a plastic opening tool between the left edge of the front display bezel and the plastic strip attached to the rear bezel, with the edge of the tool angled toward the LCD.

  • Rotate the tool away from the LCD to pop the rear bezel off the tabs on the front display bezel.

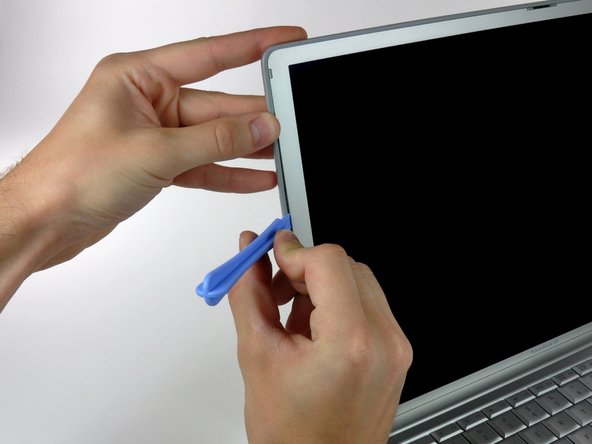
  • Work along the left edge of the display until the rear bezel is evenly separated from the front bezel.

  • Freeing these tabs may require some force. Be sure to support the display assembly with your other hand to avoid putting too much strain on the hinges.

Los siguientes pasos requieren el uso de herramientas de apertura de plástico y spudgers que probablemente serán destruidos en el proceso. Ten a mano algunos repuestos de cada herramienta.

Inserta una herramienta de apertura de plástico entre el borde izquierdo del bisel de la pantalla frontal y la tira de plástico unida al bisel posterior, con el borde de la herramienta en ángulo hacia la pantalla LCD.

Gira la herramienta lejos de la pantalla LCD para sacar el bisel posterior de las pestañas del bisel de la pantalla frontal.

Trabaja a lo largo del borde izquierdo de la pantalla hasta que el bisel posterior esté uniformemente separado del bisel frontal.

Liberar estas pestañas puede requerir algo de fuerza. Asegúrate de sostener el ensamblaje de la pantalla con la otra mano para evitar presionar demasiado las bisagras.

crwdns2944171:0crwdnd2944171:0crwdnd2944171:0crwdnd2944171:0crwdne2944171:0