crwdns2931529:0crwdnd2931529:0crwdnd2931529:0crwdnd2931529:05crwdnd2931529:0crwdne2931529:0
crwdns2935425:09crwdne2935425:0
crwdns2931653:09crwdne2931653:0


-
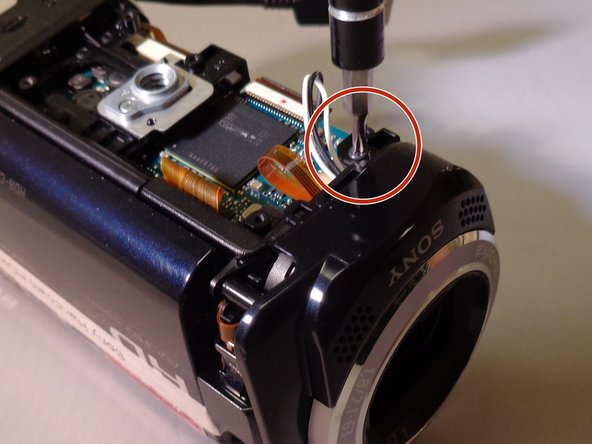
Orient the camera to the side opposite of the recording buttons where the leather strap was. Locate the orange motherboard and remove the three nearby 5mm black screws and 4mm silver screw.
| - | [* red] |
|---|---|
| - | [* icon_note] The silver screw is located on the front right of the camera |
| + | [* red] Orient the camera to the side opposite of the recording buttons where the leather strap was. Locate the orange motherboard and remove the three nearby 5mm black screws and 4mm silver screw. |
| + | [* icon_note] The silver screw is located on the front right-side of the camera and is attached to the main panel. |
crwdns2944171:0crwdnd2944171:0crwdnd2944171:0crwdnd2944171:0crwdne2944171:0