crwdns2933423:0crwdne2933423:0

iPad 3Gのフロントパネルアセンブリの交換

crwdns2936315:0crwdne2936315:0
crwdns2936323:0crwdne2936323:0
crwdns2931653:04crwdne2931653:0
iPad 3G Front Panel Assembly Replacement: crwdns2935265:00crwdnd2935265:01crwdnd2935265:03crwdne2935265:0 iPad 3G Front Panel Assembly Replacement: crwdns2935265:00crwdnd2935265:02crwdnd2935265:03crwdne2935265:0 iPad 3G Front Panel Assembly Replacement: crwdns2935265:00crwdnd2935265:03crwdnd2935265:03crwdne2935265:0
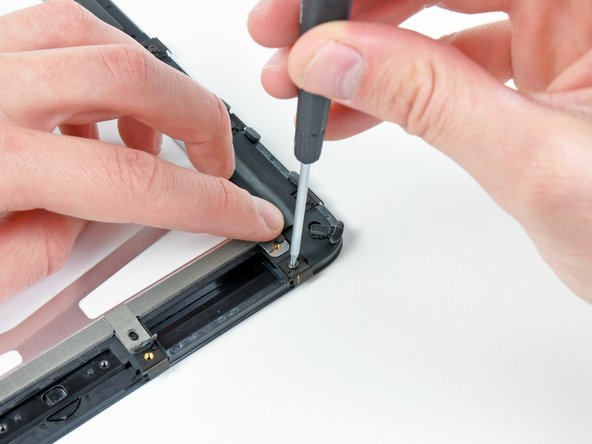
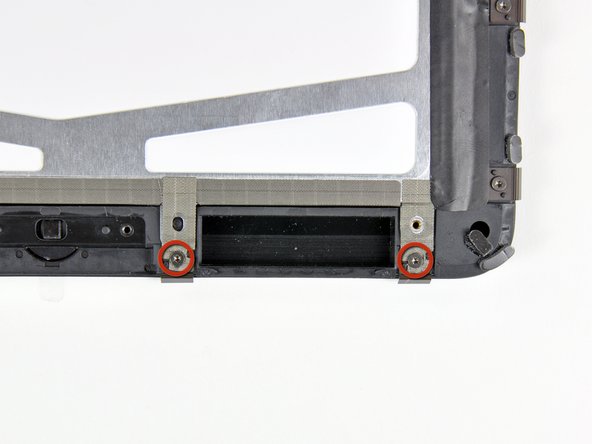
  • Hold back the strips of EMI tape along the lower edge of the LCD as you remove the two T5 Torx screws securing the retaining clips shown.

  • Stick the tape down against the new clips and reinstall the two T5 Torx screws.

固定クリップに留められたT5トルクネジ2本を外しながら、EMIテープのストリップの裏側をLCD下側端に沿って押さえます。

新しいクリップ側にテープを貼り、T5 トルクネジ2本を再度取り付けます。

crwdns2944171:0crwdnd2944171:0crwdnd2944171:0crwdnd2944171:0crwdne2944171:0