crwdns2933423:0crwdne2933423:0

iPad Wi-Fi フロントパネルアセンブリの交換

crwdns2931527:0crwdnd2931527:0crwdnd2931527:0crwdnd2931527:0crwdne2931527:0

crwdns2935425:05crwdne2935425:0

crwdns2936315:0crwdne2936315:0
crwdns2936323:0crwdne2936323:0
crwdns2931653:05crwdne2931653:0
iPad Wi-Fi Front Panel Assembly Replacement: crwdns2935265:00crwdnd2935265:01crwdnd2935265:03crwdne2935265:0 iPad Wi-Fi Front Panel Assembly Replacement: crwdns2935265:00crwdnd2935265:02crwdnd2935265:03crwdne2935265:0 iPad Wi-Fi Front Panel Assembly Replacement: crwdns2935265:00crwdnd2935265:03crwdnd2935265:03crwdne2935265:0
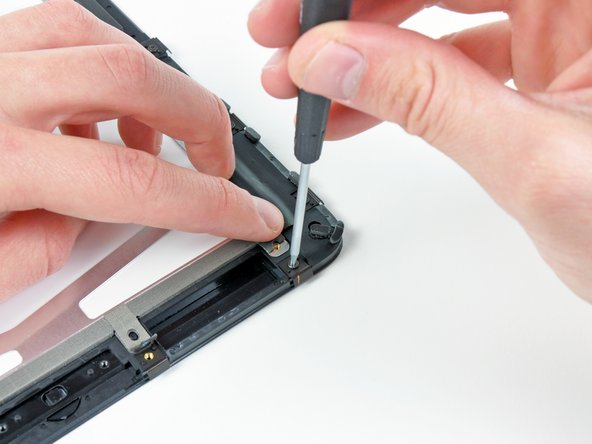
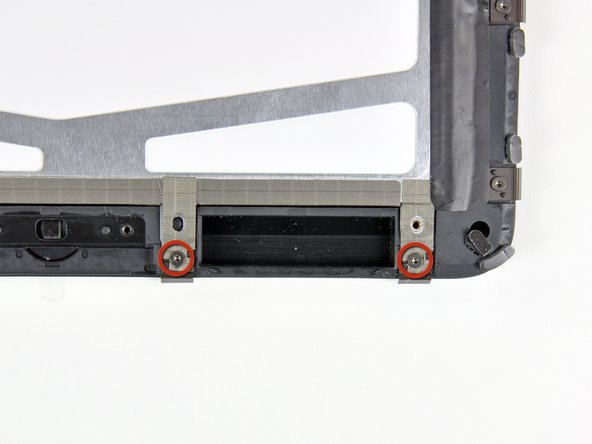
  • Hold back the strips of EMI tape along the lower edge of the LCD as you remove the two T5 Torx screws securing the retaining clips shown.

  • Stick the tape down against the new clips and reinstall the two T5 Torx screws.

  • If you are replacing your panel with a new one, be aware that the new panel may have a protective film on the outside and/or inside of the frame. This needs to be removed.

画像にあるように、固定クリップを留めてている2本のT5トルクスネジを外す際は、EMIテープのストリップをLCDの下端に沿って押さえます。

新しいクリップにテープを貼り付け、2本のT5 トルクスネジを装着します。

パネルを新しいものと交換する場合、新しいパネルのフレームの内側または外側、あるいはその両方に保護フィルムが貼られているか確認してください。このフィルムは剥がしてください。

crwdns2944171:0crwdnd2944171:0crwdnd2944171:0crwdnd2944171:0crwdne2944171:0