crwdns2933423:0crwdne2933423:0

Remplacement du panneau frontal complet de l'iPad Wi-Fi

crwdns2931527:0crwdnd2931527:0crwdnd2931527:0crwdnd2931527:0crwdne2931527:0

crwdns2935425:05crwdne2935425:0

crwdns2936315:0crwdne2936315:0
crwdns2936317:0crwdne2936317:0
crwdns2931653:05crwdne2931653:0
iPad Wi-Fi Front Panel Assembly Replacement: crwdns2935265:00crwdnd2935265:01crwdnd2935265:03crwdne2935265:0 iPad Wi-Fi Front Panel Assembly Replacement: crwdns2935265:00crwdnd2935265:02crwdnd2935265:03crwdne2935265:0 iPad Wi-Fi Front Panel Assembly Replacement: crwdns2935265:00crwdnd2935265:03crwdnd2935265:03crwdne2935265:0
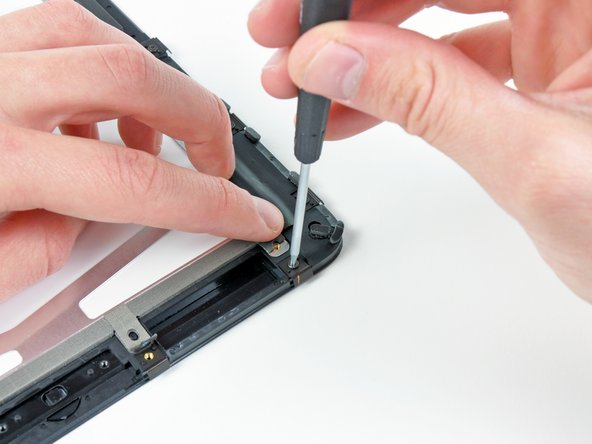
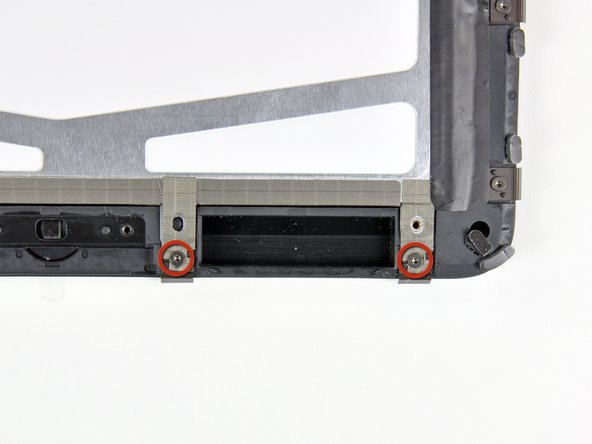
  • Hold back the strips of EMI tape along the lower edge of the LCD as you remove the two T5 Torx screws securing the retaining clips shown.

  • Stick the tape down against the new clips and reinstall the two T5 Torx screws.

  • If you are replacing your panel with a new one, be aware that the new panel may have a protective film on the outside and/or inside of the frame. This needs to be removed.

Tenez de côté les bandes de ruban adhésif EMI le long du bord inférieur de l'écran LCD lorsque vous retirez les deux vis Torx T5 fixant les clips de retenue.

Recollez le ruban adhésif sur les nouveaux clips et réinstallez les deux vis Torx T5.

Si vous remplacez votre panneau par un nouveau, sachez que le nouveau panneau peut avoir un film protecteur à l'extérieur et/ou à l'intérieur du cadre. Celui-ci doit être enlevé.

crwdns2944171:0crwdnd2944171:0crwdnd2944171:0crwdnd2944171:0crwdne2944171:0