crwdns2931529:0crwdnd2931529:0crwdnd2931529:0crwdnd2931529:02crwdnd2931529:0crwdne2931529:0
crwdns2935425:01crwdne2935425:0
crwdns2931653:01crwdne2931653:0


-
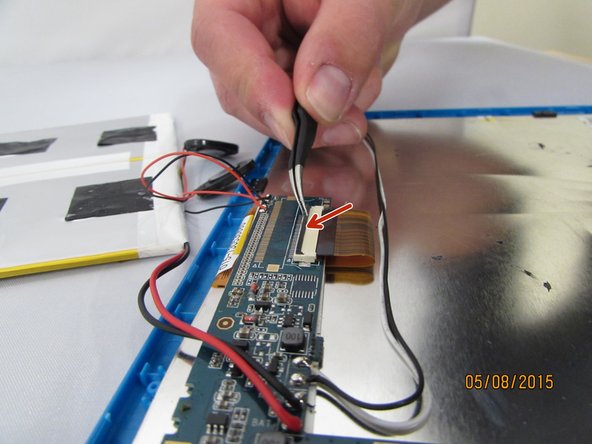
Locate the LCD Connector.
-
Using tweezers, grip the small black tab connected to the white plastic.
-
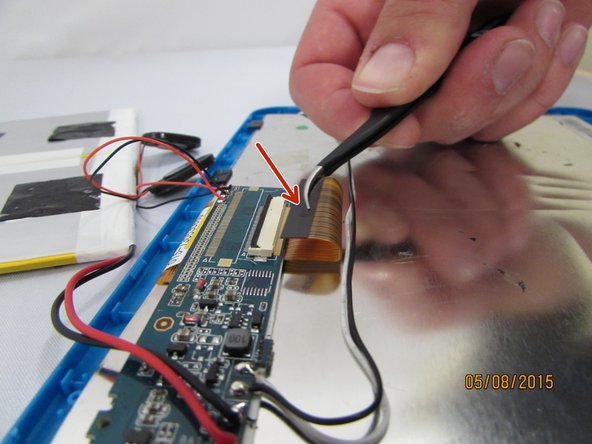
Gently lift the tab towards you until it clicks.
-
Remove the connector by pulling straight out, gripping the black connector head.
| [* black] Locate the LCD Connector. | |
| - | [* black] Using tweezers, grip the small black tab connected to the white plastic. |
| + | [* black] Using [product|IF145-020|tweezers], grip the small black tab connected to the white plastic. |
| [* black] Gently lift the tab towards you until it clicks. | |
| [* black] Remove the connector by pulling straight out, gripping the black connector head. |
crwdns2944171:0crwdnd2944171:0crwdnd2944171:0crwdnd2944171:0crwdne2944171:0