crwdns2933423:0crwdne2933423:0

Lightsaber Teardown

crwdns2936315:0crwdne2936315:0
crwdns2936313:0crwdne2936313:0
crwdns2931653:03crwdne2931653:0
Lightsaber Teardown: crwdns2935265:00crwdnd2935265:01crwdnd2935265:03crwdne2935265:0 Lightsaber Teardown: crwdns2935265:00crwdnd2935265:02crwdnd2935265:03crwdne2935265:0 Lightsaber Teardown: crwdns2935265:00crwdnd2935265:03crwdnd2935265:03crwdne2935265:0
  • We'll get back to that crystal chamber a bit later. For now, we set out to open the saber itself.

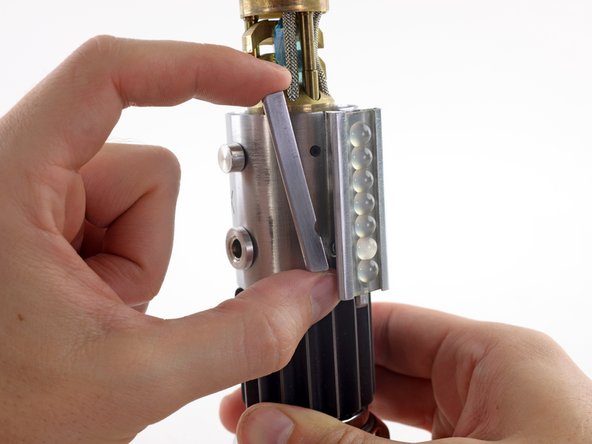
  • Let's start by unscrewing this clamp pin that secures the switch housing cover.

  • With the pin removed, we're able to lift the clamp brackets out with no trouble.

  • It seems Obi-Wan saw fit to include a charging port on his lightsaber. Lucky for us, he decided to use a standard DC barrel jack connector.

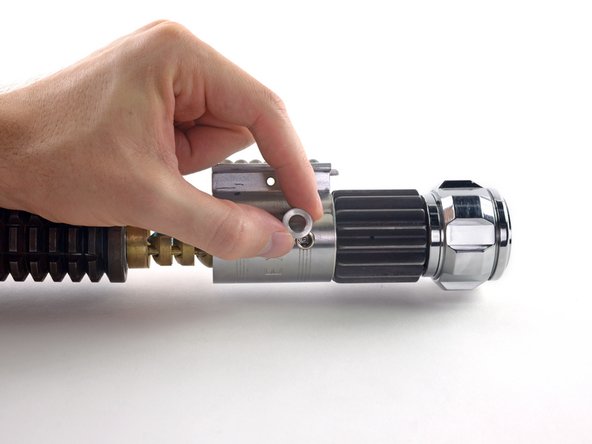
  • Unscrewing this small retaining ring loosens the port from the housing cover.

crwdns2935429:0crwdne2935429:0

crwdns2935429:0crwdne2935429:0

crwdns2935429:0crwdne2935429:0

crwdns2935429:0crwdne2935429:0

crwdns2935429:0crwdne2935429:0

crwdns2944171:0crwdnd2944171:0crwdnd2944171:0crwdnd2944171:0crwdne2944171:0