crwdns2931529:0crwdnd2931529:0crwdnd2931529:0crwdnd2931529:03crwdnd2931529:0crwdne2931529:0
crwdns2935425:03crwdne2935425:0
crwdns2931653:03crwdne2931653:0


-
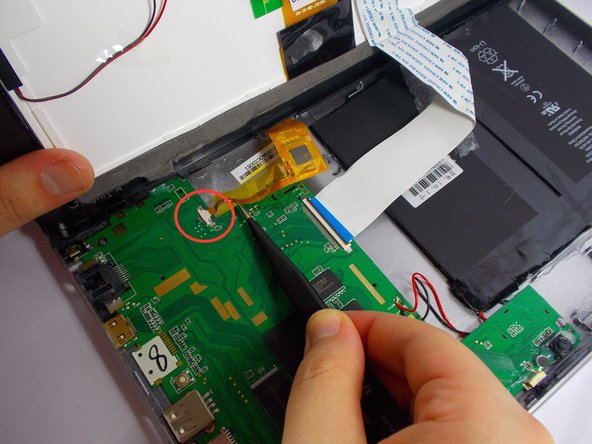
Using a pair of tweezers, gently unplug connectors A and B from the logic board.
-
Completely separate the screen and case.
| - | [* red] Using a pair of tweezers, gently unplug connectors A and B from the logic board. |
|---|---|
| + | [* red] Using a pair of [product|IF145-020|tweezers], gently unplug connectors A and B from the logic board. |
| [* black] Completely separate the screen and case. |
crwdns2944171:0crwdnd2944171:0crwdnd2944171:0crwdnd2944171:0crwdne2944171:0