crwdns2931527:0crwdnd2931527:0crwdnd2931527:0crwdnd2931527:0crwdne2931527:0
crwdns2935425:01crwdne2935425:0
crwdns2931653:01crwdne2931653:0


-
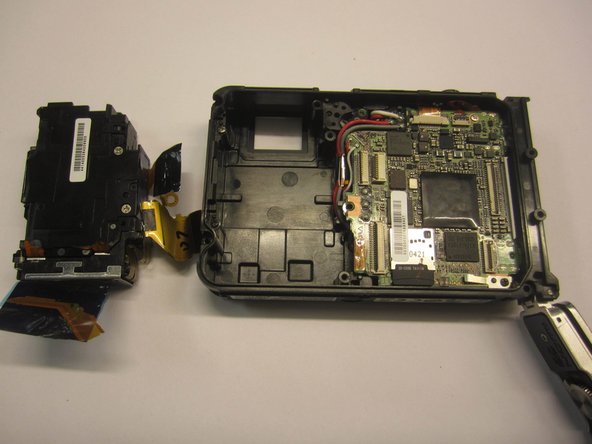
Remove any tape on the flash component on the left.
-
Using tweezers, disconnect the plastic strip from its connector on the motherboard by lifting the plastic black flap on the connector and pulling the ribbon.
-
Using a #000 Philips head screwdriver remove four screws (4.1mm) on the metal plate.
-
Gently lift the flash components out of the camera casing.
| [* black] Remove any tape on the flash component on the left. | |
| - | [* red] Using tweezers, disconnect the plastic strip from its connector on the motherboard by lifting the plastic black flap on the connector and pulling the ribbon. |
| + | [* red] Using [product|IF145-020|tweezers], disconnect the plastic strip from its connector on the motherboard by lifting the plastic black flap on the connector and pulling the ribbon. |
| [* orange] Using a #000 Philips head screwdriver remove four screws (4.1mm) on the metal plate. | |
| [* black] Gently lift the flash components out of the camera casing. |
crwdns2944171:0crwdnd2944171:0crwdnd2944171:0crwdnd2944171:0crwdne2944171:0