crwdns2933423:0crwdne2933423:0

HKC P886A Status LED Replacement

crwdns2936315:0crwdne2936315:0
crwdns2936323:0crwdne2936323:0
crwdns2931653:03crwdne2931653:0
HKC P886A Status LED Replacement: crwdns2935265:00crwdnd2935265:01crwdnd2935265:02crwdne2935265:0 HKC P886A Status LED Replacement: crwdns2935265:00crwdnd2935265:02crwdnd2935265:02crwdne2935265:0
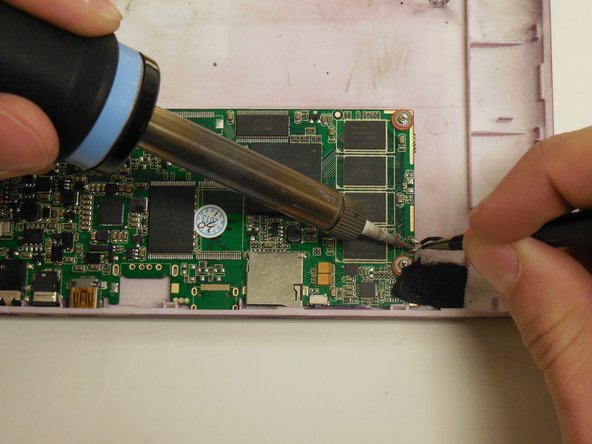
  • Using a soldering iron apply heat to the connection point where the LED connects to the PCB.

  • When the solder is heated sufficiently (turns liquid and shiny) insert the LED lead with tweezers. If necessary add additional solder to ensure a solid electrical connection.

  • When connecting the new LED attach the longer lead to the positive connection point (denoted on the PCB by '+'), and the shorter lead to the negative (denoted by '-').

  • Repeat for the other connection point.

  • If the LED is connected backwards the LED will not work.

crwdns2935429:0crwdne2935429:0

crwdns2935429:0crwdne2935429:0

crwdns2935429:0crwdne2935429:0

crwdns2935429:0crwdne2935429:0

crwdns2935429:0crwdne2935429:0

crwdns2944171:0crwdnd2944171:0crwdnd2944171:0crwdnd2944171:0crwdne2944171:0