crwdns2933423:0crwdne2933423:0

Olympus E-Pl1 Sensor Assembly Removal

crwdns2931529:0crwdnd2931529:0crwdnd2931529:0crwdnd2931529:02crwdnd2931529:0crwdne2931529:0

crwdns2935425:01crwdne2935425:0

crwdns2936315:0crwdne2936315:0
crwdns2936321:0crwdne2936321:0
crwdns2931653:01crwdne2931653:0
Olympus E-Pl1 Sensor Assembly Removal: crwdns2935265:00crwdnd2935265:01crwdnd2935265:03crwdne2935265:0 Olympus E-Pl1 Sensor Assembly Removal: crwdns2935265:00crwdnd2935265:02crwdnd2935265:03crwdne2935265:0 Olympus E-Pl1 Sensor Assembly Removal: crwdns2935265:00crwdnd2935265:03crwdnd2935265:03crwdne2935265:0
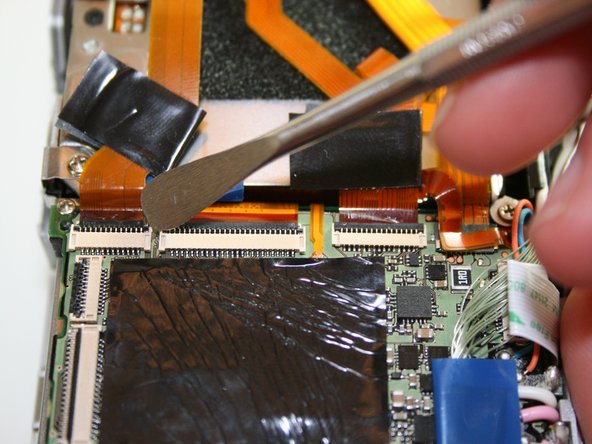
  • Using a spudger, remove the ribbon cables by pushing the black tab back and gently pulling the cable out.

  • Avoid using metal pry tools, as shown in the photo, on internal electronic components, as it can cause a short and damage the device. Use an ESD-safe tool such as a standard nylon spudger.

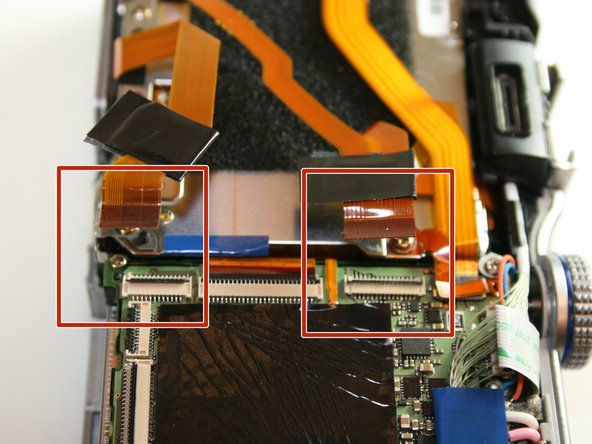
  • Do this process for the two ribbon cables shown in the third photo.

crwdns2935429:0crwdne2935429:0

crwdns2935429:0crwdne2935429:0

crwdns2935429:0crwdne2935429:0

crwdns2944171:0crwdnd2944171:0crwdnd2944171:0crwdnd2944171:0crwdne2944171:0