crwdns2933423:0crwdne2933423:0

Desmontaje del Waka Waka Power Plus

crwdns2936315:0crwdne2936315:0
crwdns2936331:0crwdne2936331:0
crwdns2931653:010crwdne2931653:0
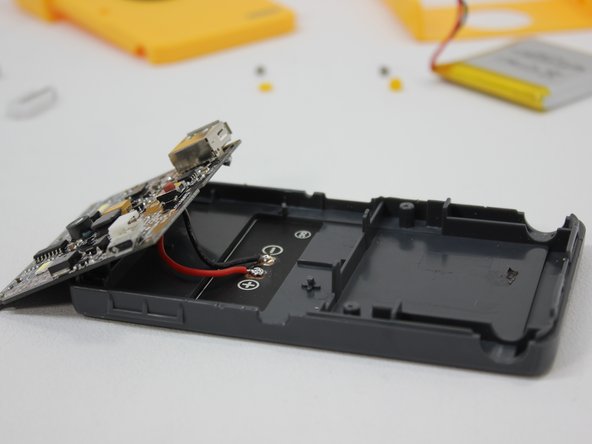
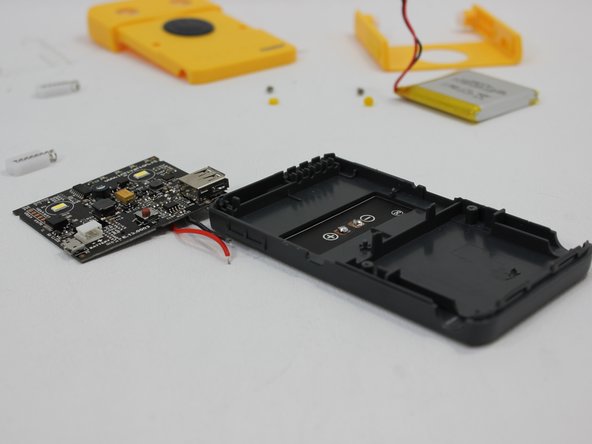
Waka Waka Power Plus Teardown, Remove the PCB: crwdns2935265:00crwdnd2935265:01crwdnd2935265:03crwdne2935265:0 Waka Waka Power Plus Teardown, Remove the PCB: crwdns2935265:00crwdnd2935265:02crwdnd2935265:03crwdne2935265:0 Waka Waka Power Plus Teardown, Remove the PCB: crwdns2935265:00crwdnd2935265:03crwdnd2935265:03crwdne2935265:0
Remove the PCB
  • There are two plastic pins holding the PCB in place. You will have to break them.

  • Undo the connection between the PCB and the solar panel with a soldering iron. Do not pull the cables out, this may result in severe damage to the cables or PCB.

  • Top tip: for one time at least, you can redo the plastic pins holding the PCB by pressing a semi-hot soldering iron on the plastic.

Hay dos clavijas de plástico que sujetan la PCB en su lugar. Tendrás que romperlas.

Deshaz la conexión entre la PCB y el panel solar con un soldador. No tires de los cables, ya que podrías dañarlos gravemente.

Un buen consejo: al menos por una vez, puedes volver a colocar las clavijas de plástico que sujetan la PCB presionando un soldador semicaliente sobre el plástico.

crwdns2944171:0crwdnd2944171:0crwdnd2944171:0crwdnd2944171:0crwdne2944171:0