crwdns2931527:0crwdnd2931527:0crwdnd2931527:0crwdnd2931527:0crwdne2931527:0
crwdns2935425:04crwdne2935425:0
crwdns2931653:04crwdne2931653:0


-
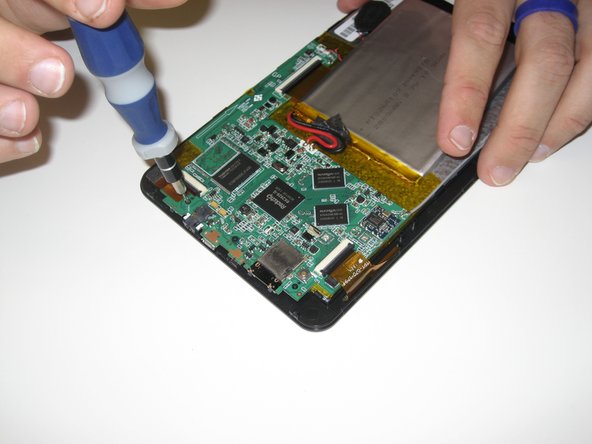
Remove the three 2.5mm Phillips screws from the motherboard.
-
After removing the screws, use a plastic opening tool to gently pull the motherboard off of the double-sided tape holding it down.
| - | [* red] Remove the three 2.5mm |
|---|---|
| - | [* black] After removing the screws, use a plastic |
| + | [* red] Remove the three 2.5mm Phillips screws from the motherboard. |
| + | [* black] After removing the screws, use a plastic opening tool to gently pull the motherboard off of the double-sided tape holding it down. |
crwdns2944171:0crwdnd2944171:0crwdnd2944171:0crwdnd2944171:0crwdne2944171:0