crwdns2931527:0crwdnd2931527:0crwdnd2931527:0crwdnd2931527:0crwdne2931527:0
crwdns2935425:04crwdne2935425:0
crwdns2931653:04crwdne2931653:0


-
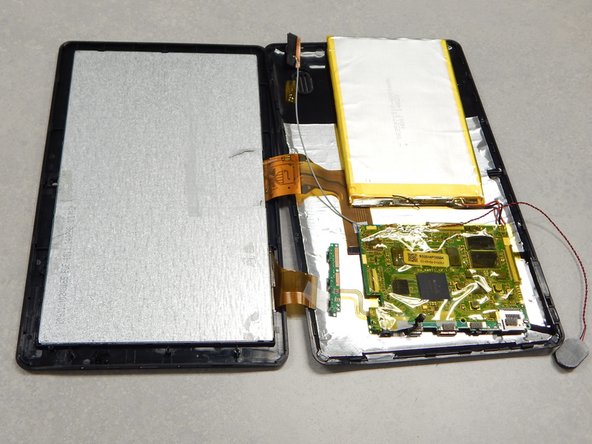
Lift the main-board up and away from the ports to reveal the microphone.
-
Use tweezers to remove the microphone from the black silicone.
-
Move the main-board off the screen.
| [* black] Lift the main-board up and away from the ports to reveal the microphone. | |
| - | [* red] Use tweezers to remove the microphone from the black silicone. |
| + | [* red] Use [product|IF145-020|tweezers] to remove the microphone from the black silicone. |
| [* black] Move the main-board off the screen. |
crwdns2944171:0crwdnd2944171:0crwdnd2944171:0crwdnd2944171:0crwdne2944171:0