crwdns2933423:0crwdne2933423:0

Repairing Non-Functional Buttons on LeapFrog Hug & Learn Baby Tad

crwdns2936315:0crwdne2936315:0
crwdns2936311:0crwdne2936311:0
crwdns2931653:09crwdne2931653:0
Repairing Non-Functional Buttons on LeapFrog Hug & Learn Baby Tad: crwdns2935265:00crwdnd2935265:01crwdnd2935265:03crwdne2935265:0 Repairing Non-Functional Buttons on LeapFrog Hug & Learn Baby Tad: crwdns2935265:00crwdnd2935265:02crwdnd2935265:03crwdne2935265:0 Repairing Non-Functional Buttons on LeapFrog Hug & Learn Baby Tad: crwdns2935265:00crwdnd2935265:03crwdnd2935265:03crwdne2935265:0
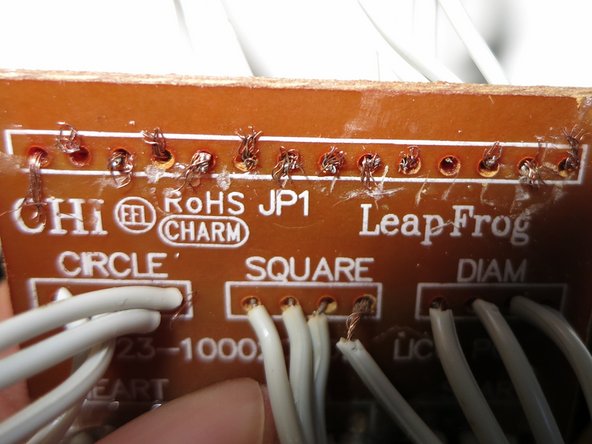
  • After you have soldered all the groups of wires, cut the excess wires on the other side of the board.

  • To prevent the wires from touching, use your needle to bend the wires in an up-and-down pattern throughout the board. Cover any exposed wires with electrical tape.

  • Once you have cut the excess wires, replace the button compartment inside the cloth bag.

  • The star, triangle, and heart should be oriented towards the head, with the blue side of the circuit board facing up.

crwdns2935429:0crwdne2935429:0

crwdns2935429:0crwdne2935429:0

crwdns2935429:0crwdne2935429:0

crwdns2935429:0crwdne2935429:0

crwdns2944171:0crwdnd2944171:0crwdnd2944171:0crwdnd2944171:0crwdne2944171:0