crwdns2933423:0crwdne2933423:0

Repairing Non-Functional Buttons on LeapFrog Hug & Learn Baby Tad

crwdns2936315:0crwdne2936315:0
crwdns2936319:0crwdne2936319:0
crwdns2931653:07crwdne2931653:0
Repairing Non-Functional Buttons on LeapFrog Hug & Learn Baby Tad: crwdns2935265:00crwdnd2935265:01crwdnd2935265:03crwdne2935265:0 Repairing Non-Functional Buttons on LeapFrog Hug & Learn Baby Tad: crwdns2935265:00crwdnd2935265:02crwdnd2935265:03crwdne2935265:0 Repairing Non-Functional Buttons on LeapFrog Hug & Learn Baby Tad: crwdns2935265:00crwdnd2935265:03crwdnd2935265:03crwdne2935265:0
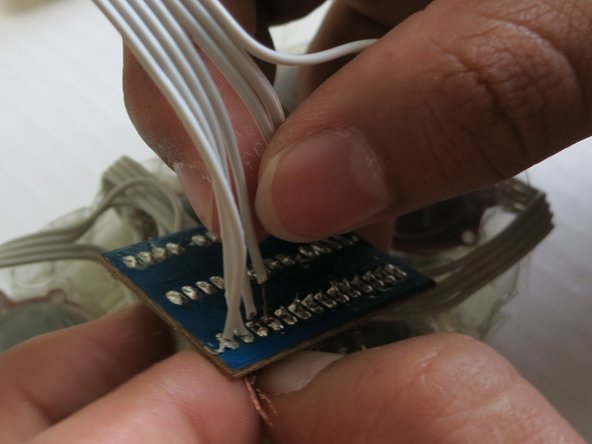
  • Once you have opened all the holes needed, take a look at the board and try to figure out where each loose wire goes.

  • Place each end of the loose wires through the holes you made in Step 7.

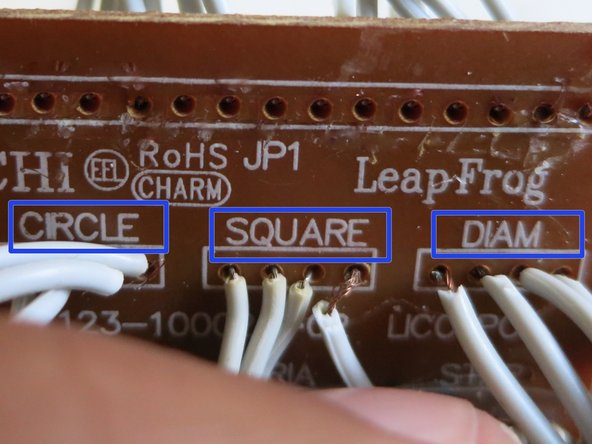
  • Each button has a group of four wires, and the circuit board is labeled with each of the buttons' names(i.e. circle, square, diamond, etc.). You can also follow the wires that are still connected as guidance.

crwdns2935429:0crwdne2935429:0

crwdns2935429:0crwdne2935429:0

crwdns2935429:0crwdne2935429:0

crwdns2944171:0crwdnd2944171:0crwdnd2944171:0crwdnd2944171:0crwdne2944171:0