crwdns2933423:0crwdne2933423:0

Reparación de botones no funcionales en LeapFrog Hug & Learn Baby Tad

crwdns2936315:0crwdne2936315:0
crwdns2936331:0crwdne2936331:0
crwdns2931653:06crwdne2931653:0
Repairing Non-Functional Buttons on LeapFrog Hug & Learn Baby Tad: crwdns2935265:00crwdnd2935265:01crwdnd2935265:03crwdne2935265:0 Repairing Non-Functional Buttons on LeapFrog Hug & Learn Baby Tad: crwdns2935265:00crwdnd2935265:02crwdnd2935265:03crwdne2935265:0 Repairing Non-Functional Buttons on LeapFrog Hug & Learn Baby Tad: crwdns2935265:00crwdnd2935265:03crwdnd2935265:03crwdne2935265:0
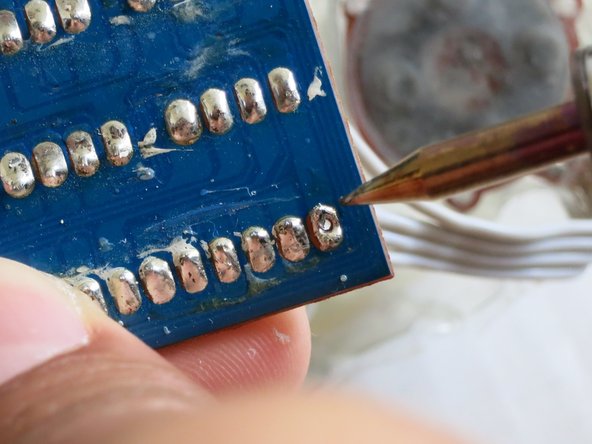
  • When the soldering iron is ready, place its tip on the first soldered bit that doesn't have a wire connected to it.

  • Once the solder begins melting, add a little pressure and you will be able to find a hole through the board.

  • Once you can see the hole, remove the soldering iron and perform this on the rest of the lone soldered bits.

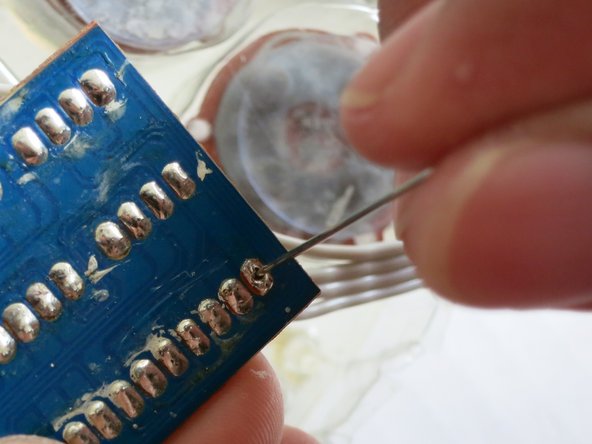
  • Insert your needle through the holes you just opened and wiggle it to clear them of any extra solder.

  • Set the soldering iron down (only on its holder) when not in use.

Cuando el soldador esté listo, coloca su punta en la primera punta soldada que no tenga un cable conectado.

Una vez que la soldadura comience a derretirse, agrega un poco de presión y podrás encontrar un agujero a través del tablero.

Una vez que puedas ver el agujero, retira el soldador y hazlo con el resto de las puntas soldadas solitarias.

Inserta la aguja a través de los orificios que acabas de abrir y muévela para eliminar cualquier exceso de soldadura.

Coloca el soldador en el suelo (solo en su soporte) cuando no esté en uso.

crwdns2944171:0crwdnd2944171:0crwdnd2944171:0crwdnd2944171:0crwdne2944171:0