crwdns2933423:0crwdne2933423:0

Reparación de botones no funcionales en LeapFrog Hug & Learn Baby Tad

crwdns2936315:0crwdne2936315:0
crwdns2936331:0crwdne2936331:0
crwdns2931653:03crwdne2931653:0
Repairing Non-Functional Buttons on LeapFrog Hug & Learn Baby Tad: crwdns2935265:00crwdnd2935265:01crwdnd2935265:03crwdne2935265:0 Repairing Non-Functional Buttons on LeapFrog Hug & Learn Baby Tad: crwdns2935265:00crwdnd2935265:02crwdnd2935265:03crwdne2935265:0 Repairing Non-Functional Buttons on LeapFrog Hug & Learn Baby Tad: crwdns2935265:00crwdnd2935265:03crwdnd2935265:03crwdne2935265:0
  • Once you have the battery compartment on the side, take all the stuffing out.

  • Under the battery compartment, there will be another compartment held in place inside a cloth bag. This will be the button compartment.

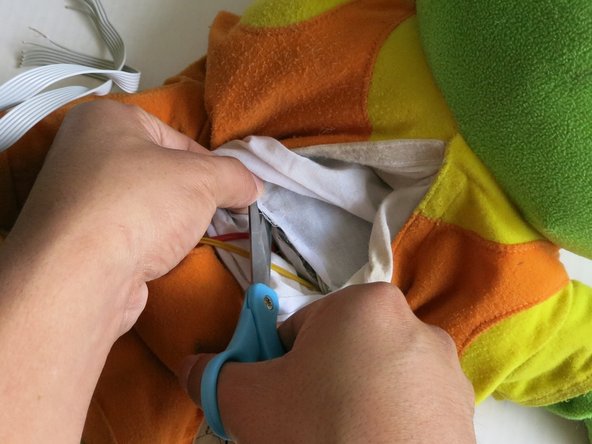
  • Carefully cut the cloth covering the button compartment around the edges.

  • To avoid damaging cables within the button compartment, you can pinch the excess cloth on the sides and begin your cut there.

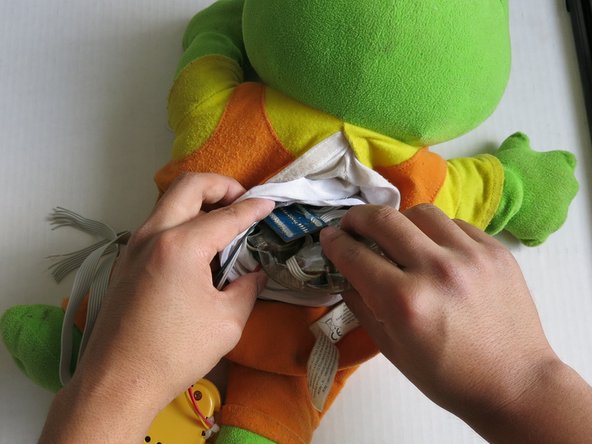
  • Remove the button compartment and set it aside.

  • NOTE: The button compartment from my LeapFrog was completely ruptured from the battery compartment.

Una vez que tengas el compartimento de la batería a un lado, saca todo el relleno.

Debajo del compartimento de la batería, habrá otro compartimento dentro de una bolsa de tela. Este será el compartimento de los botones.

Corta con cuidado la tela que cubre el compartimento de los botones alrededor de los bordes.

Para evitar dañar los cables dentro del compartimento de los botones, puedes pellizcar el exceso de tela en los lados y comenzar a cortar allí.

Retira el compartimento de los botones y déjelo a un lado.

NOTA: El compartimiento de los botones de mi LeapFrog estaba completamente separado del compartimiento de la batería.

crwdns2944171:0crwdnd2944171:0crwdnd2944171:0crwdnd2944171:0crwdne2944171:0