crwdns2933423:0crwdne2933423:0

Remplacement de la carte mère du Azpen A740

crwdns2931527:0crwdnd2931527:0crwdnd2931527:0crwdnd2931527:0crwdne2931527:0

crwdns2936315:0crwdne2936315:0
crwdns2936317:0crwdne2936317:0
crwdns2931653:03crwdne2931653:0
Azpen A740 Motherboard Replacement: crwdns2935265:00crwdnd2935265:01crwdnd2935265:02crwdne2935265:0 Azpen A740 Motherboard Replacement: crwdns2935265:00crwdnd2935265:02crwdnd2935265:02crwdne2935265:0
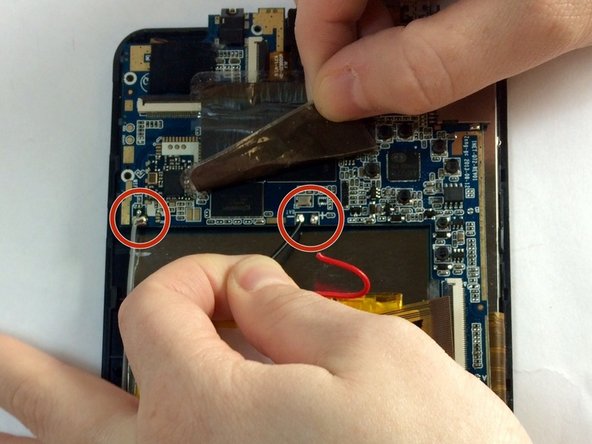
  • Now comes the desoldering. If you have never done this before, you may want to read this: How To Solder and Desolder Connections

  • In all, there should be 7 wires that need to be desoldered: 2 that are connected to the speaker, 2 that are connected to the screen, 2 that are directly connected to the battery and 1 that is connected to a thick wire that feeds into a sticker on the battery.

Maintenant vient le dessoudage. Si vous n’avez jamais fait cela auparavant, vous voudrez peut-être lire ceci: Comment souder et dessouder des connexions

Au total, il doit y avoir 7 fils à dessouder: 2 connectés à l’enceinte, 2 connectés à l’écran, 2 connectés directement à la batterie et 1 connecté à un fil épais alimentant le moniteur. un autocollant sur la batterie.

crwdns2944171:0crwdnd2944171:0crwdnd2944171:0crwdnd2944171:0crwdne2944171:0