crwdns2931527:0crwdnd2931527:0crwdnd2931527:0crwdnd2931527:0crwdne2931527:0
crwdns2935425:05crwdne2935425:0
crwdns2931653:05crwdne2931653:0


Remove LCD Screen (Part 2)
-
Gently lift the LCD screen and flip it over.
-
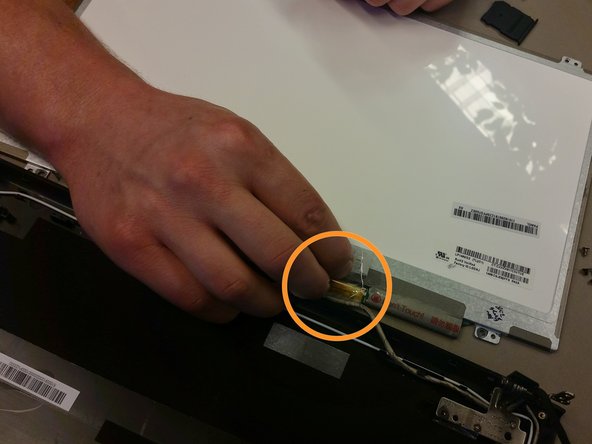
On back of the LCD screen, locate the protective tape in the bottom right corner. Peel off the tape to reveal a latch with a connector cable.
-
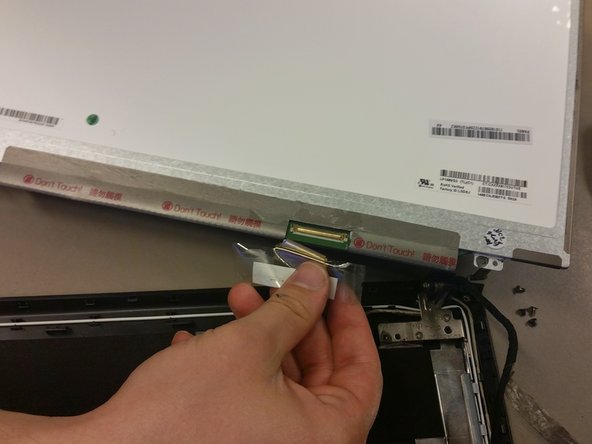
Flip the latch so that the connector cable can be removed. Remove the connector cable by pulling downwards.
-
The old LCD is now completely disconnected and you are ready to install a new LCD screen.
crwdns2944171:0crwdnd2944171:0crwdnd2944171:0crwdnd2944171:0crwdne2944171:0