crwdns2933423:0crwdne2933423:0

Oculus Rift Control Box Motherboard Replacement

crwdns2931527:0crwdnd2931527:0crwdnd2931527:0crwdnd2931527:0crwdne2931527:0

crwdns2935425:01crwdne2935425:0

crwdns2936315:0crwdne2936315:0
crwdns2936323:0crwdne2936323:0
crwdns2931653:01crwdne2931653:0
Oculus Rift Control Box Motherboard Replacement: crwdns2935265:00crwdnd2935265:01crwdnd2935265:03crwdne2935265:0 Oculus Rift Control Box Motherboard Replacement: crwdns2935265:00crwdnd2935265:02crwdnd2935265:03crwdne2935265:0 Oculus Rift Control Box Motherboard Replacement: crwdns2935265:00crwdnd2935265:03crwdnd2935265:03crwdne2935265:0
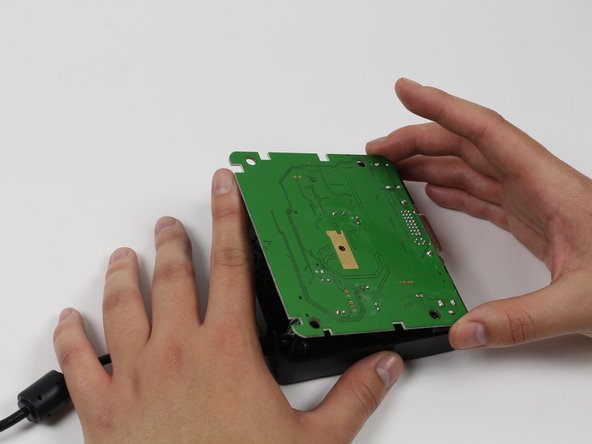
  • Use your finger(s) to start lifting the motherboard from the control box casing. While doing so, use your other hand to push the DVI connector into the control box casing.

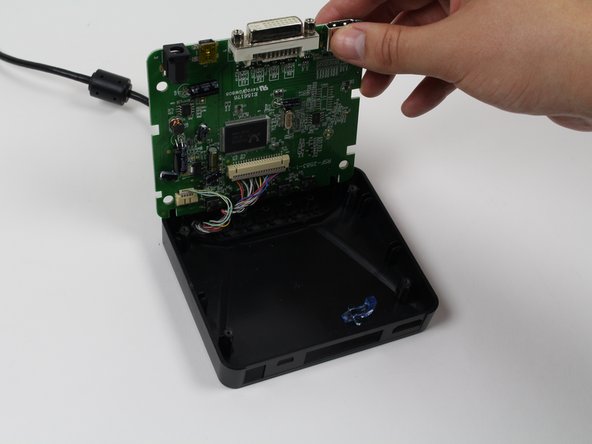
  • When the DVI connector has cleared the casing, lift the motherboard.

  • Be careful! There should be two sets of wires still connected to the control box - do not tug on them. Simply flip the motherboard over to access these wires.

  • When reassembling the device, ensure that all of the wires are clear of the buttons.

crwdns2935429:0crwdne2935429:0

crwdns2935429:0crwdne2935429:0

crwdns2935429:0crwdne2935429:0

crwdns2935429:0crwdne2935429:0

crwdns2944171:0crwdnd2944171:0crwdnd2944171:0crwdnd2944171:0crwdne2944171:0