crwdns2933423:0crwdne2933423:0

Nintendo DSi XLの上部スクリーンの交換

crwdns2936315:0crwdne2936315:0
crwdns2936323:0crwdne2936323:0
crwdns2931653:04crwdne2931653:0
Nintendo DSi XL Upper Screen Replacement: crwdns2935265:00crwdnd2935265:01crwdnd2935265:02crwdne2935265:0 Nintendo DSi XL Upper Screen Replacement: crwdns2935265:00crwdnd2935265:02crwdnd2935265:02crwdne2935265:0
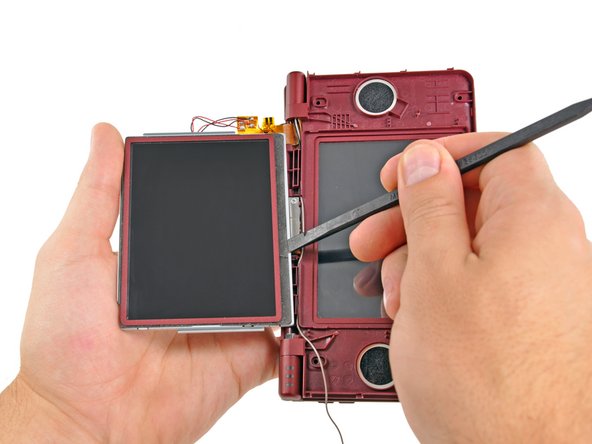
  • Insert the flat end of a spudger underneath the adhesive strip that secures the front screen to the upper LCD.

  • Slide the spudger along the bottom side of the upper LCD, freeing the adhesive along that edge.

フロントスクリーンを上部LCDに固定している接着ストリップの下に、スパッジャーの平面側先端を差し込みます。

上部LCDの底部に沿って、スパッジャーをスライドし、底部端に沿って接着剤から解放します。

crwdns2944171:0crwdnd2944171:0crwdnd2944171:0crwdnd2944171:0crwdne2944171:0