crwdns2933423:0crwdne2933423:0

Desmontaje del iPod Touch de 4.ª generación

crwdns2935425:024crwdne2935425:0

crwdns2936315:0crwdne2936315:0
crwdns2936331:0crwdne2936331:0
crwdns2931653:024crwdne2931653:0
iPod Touch 4th Generation Teardown: crwdns2935265:00crwdnd2935265:01crwdnd2935265:02crwdne2935265:0 iPod Touch 4th Generation Teardown: crwdns2935265:00crwdnd2935265:02crwdnd2935265:02crwdne2935265:0
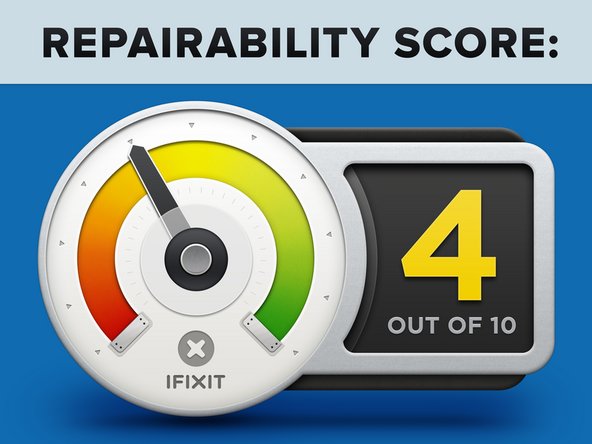
  • iPod Touch 4th Generation Repairability: 4 out of 10 (10 is easiest to repair)

  • Opening the device is pretty straightforward, as long as you have a heat gun and some iPod Touch opening tools handy.

  • The headphone jack is not soldered to the logic board, a first for the iPod Touch line.

  • The front glass and LCD are permanently fused together, increasing the cost of repairing broken front glass.

  • Removing the display completely requires removing the logic board.

  • Apple soldered the volume button and sleep button cable to the logic board. The previous Touch had a ZIF connector. This makes removing logic board very difficult.

  • The battery is still soldered to the logic board, just like previous models.

Capacidad de reparación del iPod Touch de 4.ª generación: 4 de 10 (10 es el más fácil de reparar)

Abrir el dispositivo es bastante sencillo, siempre y cuando tengas a mano una pistola de aire caliente y algunas herramientas de apertura del iPod Touch.

El conector para auriculares no está soldado a la placa lógica, por primera vez en la línea iPod Touch.

El vidrio frontal y la pantalla LCD están permanentemente fusionados, lo que aumenta el costo de reparar el vidrio frontal roto.

Quitar la pantalla por completo requiere quitar la placa lógica.

Apple soldó el botón de volumen y el cable del botón de suspensión a la placa lógica. El Touch anterior tenía un conector ZIF. Esto hace que quitar la placa lógica sea muy difícil.

La batería todavía está soldada a la placa lógica, al igual que los modelos anteriores.

crwdns2944171:0crwdnd2944171:0crwdnd2944171:0crwdnd2944171:0crwdne2944171:0